
There’s a moment when you walk into your kitchen and realize the cabinets just aren’t doing it anymore. Maybe the color feels dated. Maybe the hardware screams 2005. Whatever it is, you feel it every single morning while you’re waiting for coffee to brew.
You’re not alone in wanting a change — and you don’t need a full gut renovation to get one. Redoing kitchen cabinets is one of the fastest ways to make your entire kitchen feel brand new without ripping everything out and starting from scratch.
What you’ll find here are 17 genuinely different ideas for refreshing, restyling, and rethinking your cabinets. From simple paint tricks to full door replacements, each one stands on its own so you can pick what fits your budget, your style, and your Saturday afternoon.
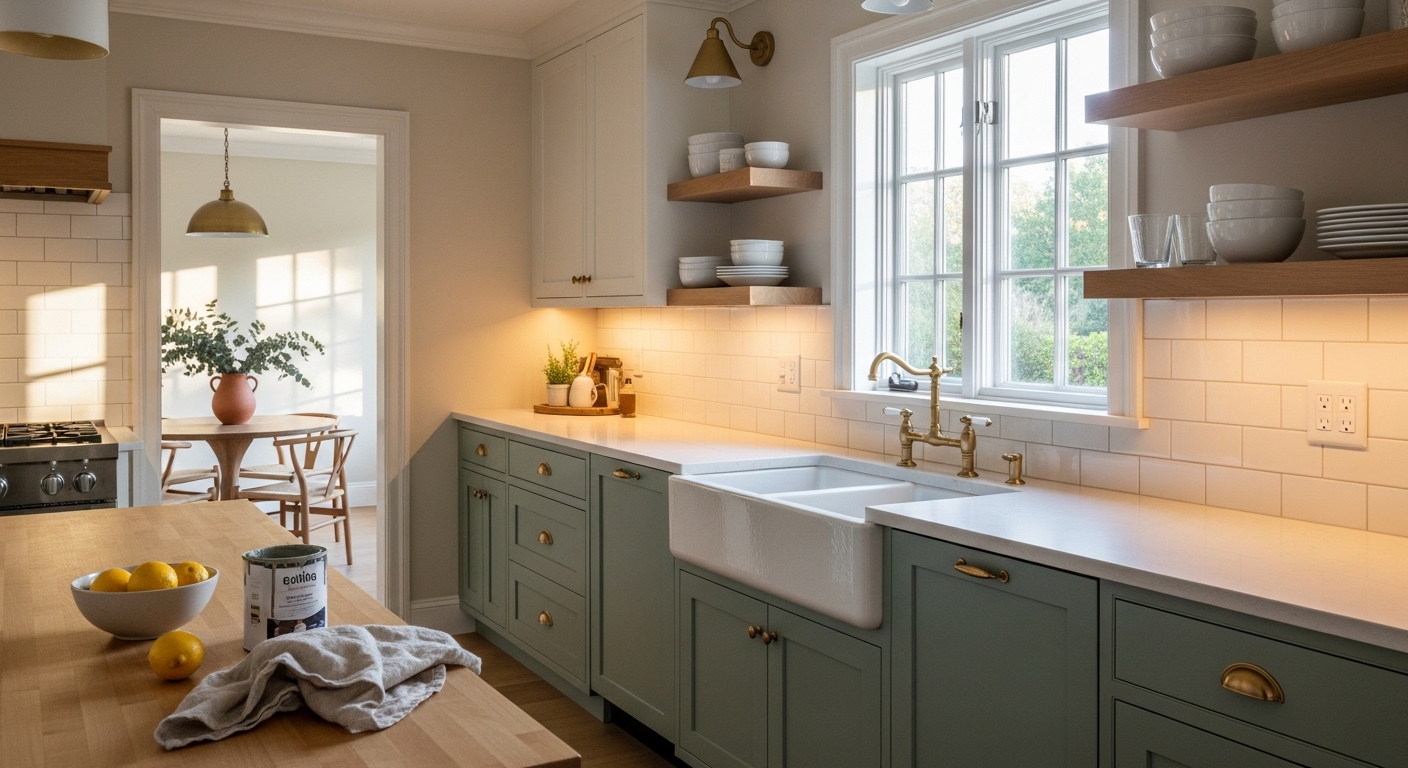
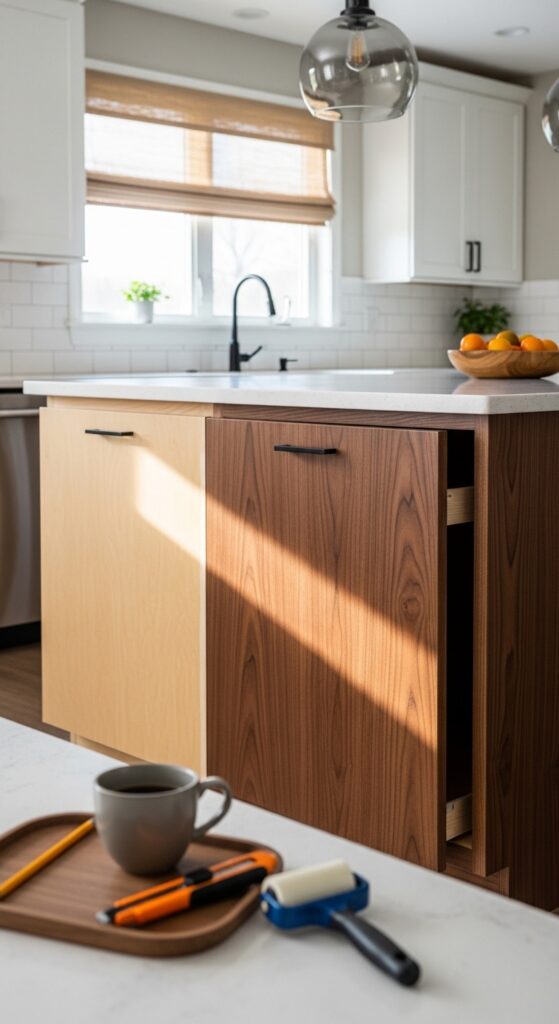
1. Two-Tone Cabinet Color Blocking: Upper and Lower Contrast
Paint your upper cabinets a lighter shade and your lowers something darker or bolder. This trick adds visual depth, breaks up a monotonous wall of cabinetry, and makes the kitchen feel more custom — like it was designed, not installed from a catalog.
Worth knowing — the two colors need to share the same undertone or the whole thing looks accidental. Cool grays clash with warm whites faster than you’d expect. Test swatches side by side in your actual kitchen light before committing.
Contrast is the cheapest way to make a kitchen look like it cost twice as much.
Here are some picks that make this easier:
- Premium Semi-Gloss Cabinet Paint Kit — Refresh your lowers and uppers with a durable, self-leveling formula for streak-free results.
- Soft-Bristle Angled Cabinet Brush Set — Reach into panel grooves and edges with precision bristles for clean two-tone lines.
- Repositionable Painter’s Tape for Cabinets — Mask your color dividing line with flexible, residue-free tape for sharp edges.
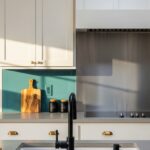
2. Matte Black Hardware Swap on Light Cabinets
Sometimes the fastest fix is the smallest one. Swapping out old knobs and pulls for matte black hardware on white or light wood cabinets creates instant modern contrast. It’s a thirty-minute project that punches way above its weight.

Be realistic though — cheap matte black finishes can chip or fade within a year, especially on high-traffic drawers. Spend a little more on solid steel or zinc alloy pulls. Your future self will thank you.
New hardware is a kitchen’s version of a fresh haircut — small change, big confidence.
These make the swap painless:
- Solid Steel Matte Black Bar Pulls — Anchor your cabinet doors with heavy-duty pulls that resist fingerprints and daily wear.
- Matching Black Cabinet Knob Collection — Tie your drawer fronts together with a consistent, low-profile knob design for clean lines.
- Adjustable Cabinet Hole Drilling Template — Align new hardware holes perfectly with a reusable guide for consistent placement every time.
3. Open Shelving Conversion for Everyday Dishes
Ripping the doors off a few upper cabinets and sanding the interior creates instant open shelving. Stack your everyday plates, mugs, and bowls where you can grab them without thinking. The kitchen suddenly feels airy and twice as big.
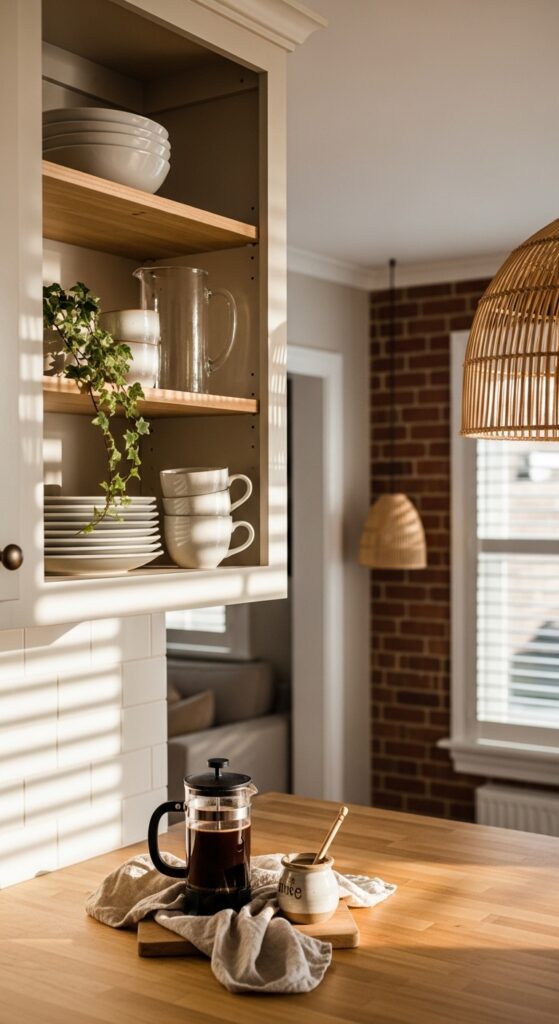
One thing to watch — dust and grease settle on open shelves fast, especially near the stove. If you’re not someone who wipes things down regularly, limit open shelving to areas away from the cooking zone.
The dishes you love shouldn’t hide behind closed doors.
Stock your new shelves right:
- Stackable Stoneware Everyday Dish Set — Fill your open shelves with handsome, chip-resistant pieces that look good on display.
- Clear Acrylic Shelf Risers for Cabinets — Double your visible storage space with transparent risers that keep stacks organized.
- Adhesive Shelf Liner in Natural Linen — Protect bare cabinet interiors with a textured, wipeable liner for a finished look.
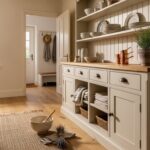
4. Chalk-Painted Cabinets with Distressed Edges
Chalk paint sticks to almost anything without priming, and the matte finish has a soft, lived-in quality that works especially well in cottage, farmhouse, or eclectic kitchens. Sand the edges lightly after painting to reveal the wood or previous color underneath.
Fair warning — chalk paint isn’t as durable as latex or alkyd enamel. High-traffic cabinets around the sink and dishwasher will wear faster. Seal everything with a quality wax or topcoat, and plan on touching up once a year.
A little wear on a cabinet isn’t damage — it’s character you can’t buy.
Get started with these:
- All-Surface Chalk Finish Cabinet Paint — Cover your doors in a velvety matte coat without sanding or priming first.
- Natural Beeswax Protective Topcoat Paste — Seal your painted finish with a hand-buffed wax layer for lasting protection.
- Fine-Grit Sanding Sponge Multi-Pack — Distress edges and corners with flexible sponges that conform to molding profiles.
5. Peel-and-Stick Vinyl Wrap for a Rental-Friendly Refresh
If you’re renting or don’t want to deal with paint fumes, vinyl wrap is a real option now. Modern versions come in realistic wood grain, solid matte finishes, and even marble patterns. They go on with a squeegee and peel off clean when your lease ends.
Here’s the catch — bubbles and wrinkles are almost guaranteed on your first try. Work slowly from the center outward and use a heat gun on corners. Also, cheap vinyl yellows in sunlight within months. Go with a UV-resistant option.
Renters deserve kitchens they actually like coming home to.
These keep it smooth:
- UV-Resistant Matte Cabinet Vinyl Roll — Cover flat-panel doors with a peel-and-stick film that resists yellowing and peeling.
- Precision Vinyl Application Squeegee Kit — Smooth out bubbles and creases with a firm-edge tool designed for large surfaces.
- Portable Heat Gun for Vinyl Forming — Soften wrap material around cabinet edges with controlled, low-heat airflow for tight corners.
6. Shaker-Style Door Overlays on Flat-Panel Cabinets
Flat slab doors are fine, but they can feel sterile. Adding thin shaker-style trim overlays with wood glue and pin nails gives flat doors an architectural upgrade. Paint everything the same color and nobody will know you didn’t buy new doors.

That said — if your existing doors are warped, peeling, or thermofoil that’s lifting at the edges, overlays won’t fix the underlying problem. This works best on solid wood or MDF doors that are still structurally sound.
Trim is cheap. The custom look it creates is not.
Build the look with these:
- Pre-Cut Shaker Trim Overlay Kit — Add framed detail to flat cabinet doors with pre-measured, paintable molding strips.
- Wood-Bonding Cabinet Panel Adhesive — Attach overlay trim permanently with a moisture-resistant glue that holds through humidity swings.
- Micro Pin Nailer for Cabinet Trim — Secure thin moldings without splitting wood using near-invisible pin nails for clean joins.
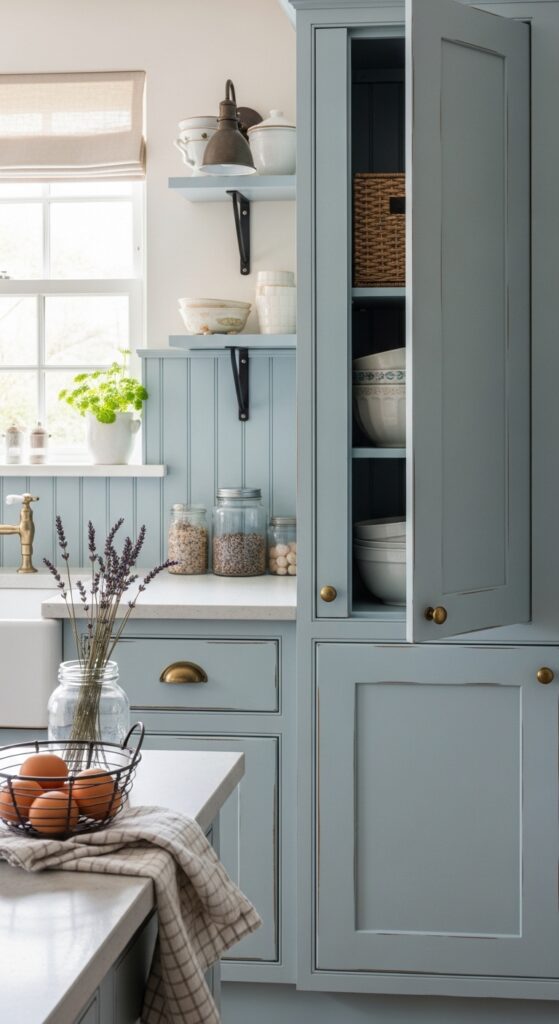
7. Glass-Front Inserts for Display-Worthy Cabinets
Swapping a few solid upper doors for glass-front inserts makes a kitchen feel more open and curated. Put your nicest glassware, ceramics, or cookbooks behind the glass. It’s the kind of detail you see in designer kitchens, but it’s actually a straightforward DIY.
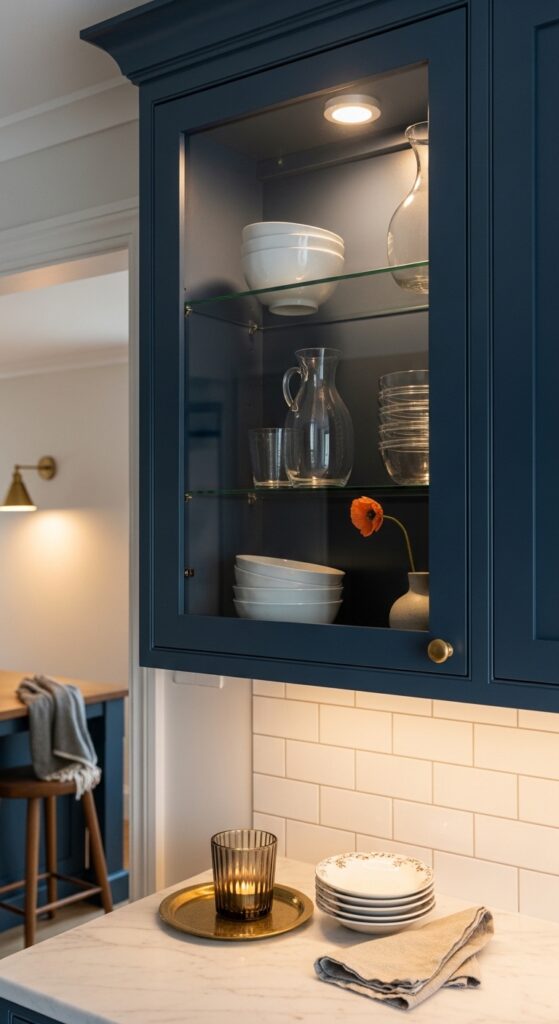
Keep in mind — everything behind glass needs to look intentional. Mismatched plastic containers and half-empty spice bags will make it look cluttered, not curated. Commit to editing what’s visible or stick with solid doors.
Glass doors are an invitation to own less and display better.
Set it up right:
- Tempered Glass Cabinet Insert Panels — Replace solid center panels with clear, shatter-resistant glass cut to your door dimensions.
- Slim Puck LED Cabinet Interior Lights — Illuminate your display shelves with battery-powered, adhesive lights for a gallery effect.
- Frosted Privacy Glass Adhesive Film — Soften the view behind doors with a translucent film that hides imperfect shelf styling.
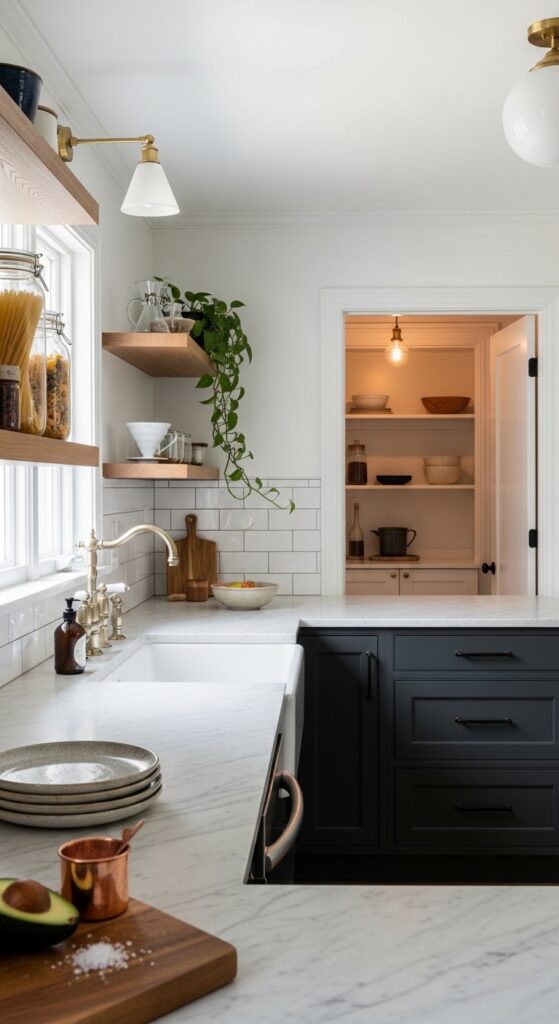
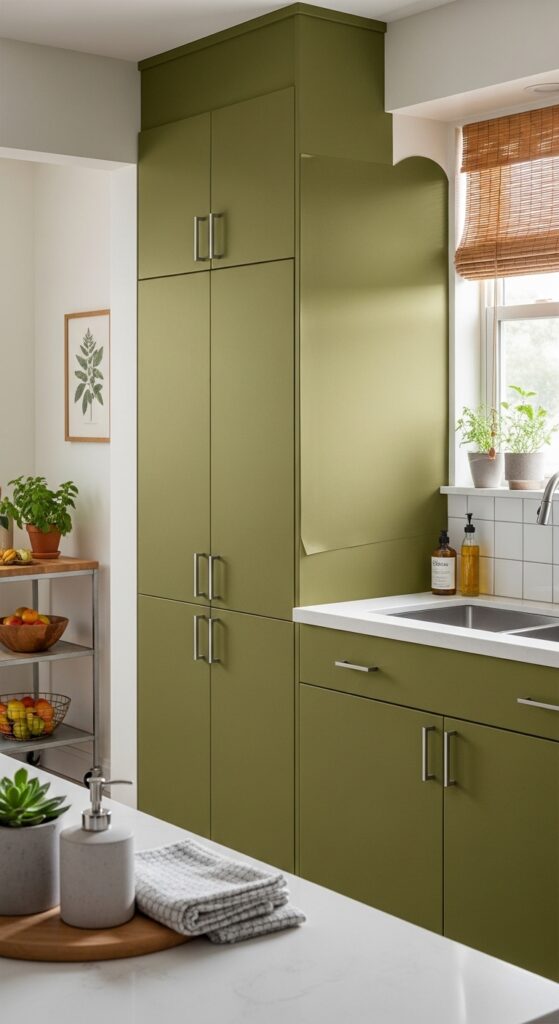
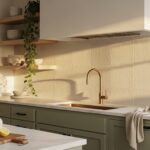
8. Bold Color Drenching on a Single Cabinet Wall
Forget safe neutrals. Pick one wall of cabinets — usually the one you see first when entering — and drench it in a bold color. Deep green, navy blue, terracotta, or even plum. Paint the wall behind it the same shade for a dramatic, immersive effect.

Honestly — bold kitchen color scares a lot of people because they worry about resale value. But a single color-drenched wall is easy to repaint. You’re not tiling in emerald green. Give yourself permission to be brave for a few years.
One wall of real color does more than a whole kitchen of safe beige.
Go bold with these:
- High-Coverage Satin Cabinet Enamel Paint — Coat your statement wall cabinets with a rich, washable finish that dries hard.
- Dense Foam Mini Roller for Cabinets — Apply bold colors evenly on flat and recessed doors without leaving roller texture.
- Color-Matching Wall and Trim Paint Bundle — Drench your cabinet wall and backsplash area in one coordinated, deep-toned shade.
9. Leather or Rope Cabinet Pulls for Organic Warmth
Metal hardware isn’t the only option. Leather strap pulls, woven rope knobs, and brass-and-leather combinations add warmth and texture that metal alone can’t. They’re especially striking on muted green, warm white, or natural wood cabinets.
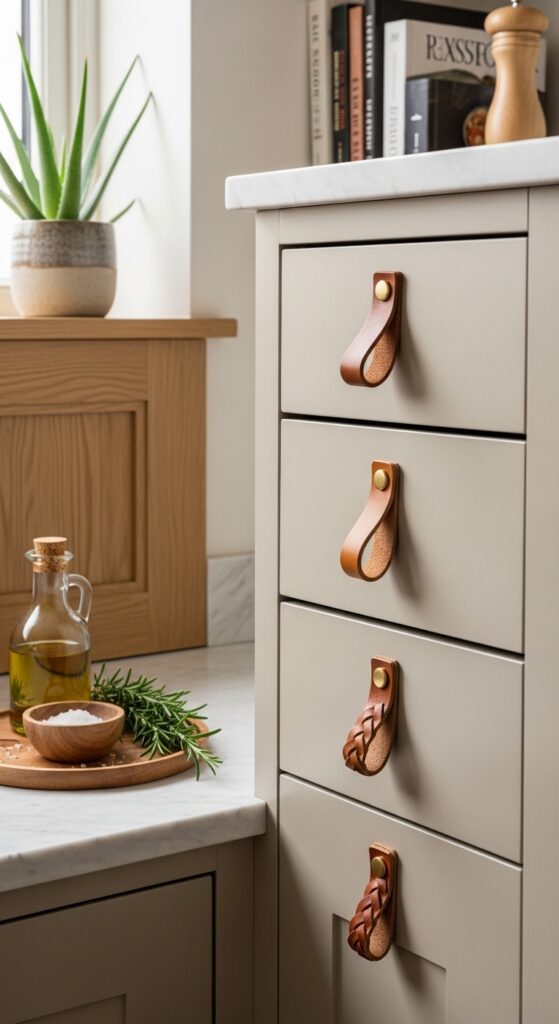
Something to note — leather pulls soften and patina over time. If you want them looking brand new forever, this isn’t your move. But if you like things that age and develop personality, they’re perfect.
The best kitchens feel like they were collected, not ordered from a catalog.
Try these:
- Vegetable-Tanned Leather Strap Pulls — Add handcrafted warmth to cabinet fronts with genuine leather pulls that patina beautifully.
- Brass and Leather Combination Knob Set — Mix materials on your drawers with a knob that pairs raw brass posts with saddle leather.
- Nautical Rope Drawer Pull Collection — Bring coastal or rustic texture to your cabinets with hand-tied, sealed cotton rope handles.
10. Wallpaper-Lined Cabinet Interiors for Hidden Surprise
Line the inside of glass-front or open cabinets with patterned wallpaper. It’s a small detail with outsized impact — every time you open a door, there’s a flash of personality. Botanical prints, geometric patterns, and bold florals all work.
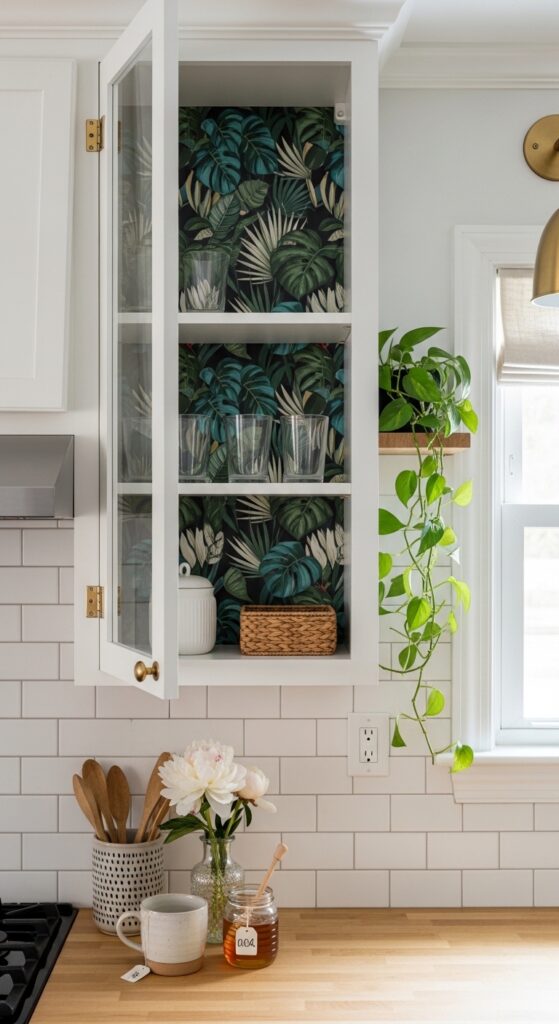
The practical side — use peel-and-stick wallpaper, not traditional paste. Cabinet interiors get humid, and paste-applied paper bubbles and peels in months near a dishwasher or sink. Peel-and-stick also lets you change patterns when you get bored.
The inside of a cabinet is the best place to take a design risk.
Line your shelves with these:
- Botanical Peel-and-Stick Wallpaper Roll — Add a lush printed backdrop inside open cabinets with a repositionable, moisture-resistant paper.
- Precision Wallpaper Smoothing Tool Kit — Press paper flat into cabinet corners with a flexible smoother designed for tight spaces.
- Self-Healing Cutting Mat for Wallpaper — Trim sheets to exact cabinet dimensions without damaging countertops or table surfaces.
11. Cabinet Refacing with Real Wood Veneer Sheets
If your cabinet boxes are sturdy but the doors and drawer fronts look tired, refacing with real wood veneer gives you the appearance of brand-new solid wood cabinets at a fraction of the cost. Peel-and-stick veneer sheets exist now in oak, walnut, maple, and cherry.
Just be aware — veneer is thin. Deep scratches will show the substrate underneath. Keep sharp objects away from door faces, and apply a polyurethane topcoat for extra protection if you have kids or pets.
Real wood grain on a plywood budget is the smartest move in kitchen design.
Reface smart with these:
- Peel-and-Stick Walnut Wood Veneer Sheets — Cover worn cabinet faces with genuine wood veneer for an instant material upgrade.
- Water-Based Polyurethane Cabinet Topcoat — Protect your new veneer surface with a clear, non-yellowing sealant for daily use.
- J-Roller Veneer Application Tool — Press veneer flat and bond it fully with a weighted roller that eliminates trapped air.
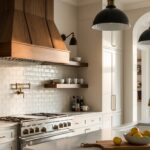
12. Floating Shelf Replacement for Bulky Upper Cabinets
Tearing out some or all upper cabinets and replacing them with floating shelves opens up a kitchen dramatically. The room feels taller, lighter, and less boxed in. It’s a bold move, but it works especially well in smaller kitchens where uppers make the space feel cramped.

Real talk — you’re trading enclosed storage for visual openness. If you have a lot of kitchen stuff and nowhere else to put it, removing uppers creates a storage problem. Be honest about how much you actually own before ripping anything out.
A kitchen that breathes is worth more than a kitchen that stores.
Build the float with these:
- Heavy-Duty Concealed Bracket Floating Shelf — Mount thick, sturdy open shelves that hold stacks of dishes without visible hardware.
- Magnetic Stud Finder for Plaster Walls — Locate wall studs accurately before mounting shelves to ensure maximum weight support.
- Rustic Reclaimed Wood Shelf Plank Set — Add character above your counter with rough-sawn, sealed wood planks in warm tones.
13. Integrated Appliance Panel Covers for a Seamless Look
Have your dishwasher, fridge, or trash pull-out fitted with panels that match your cabinet fronts. The entire kitchen reads as one continuous surface instead of a patchwork of stainless steel and wood. It’s the number one trick in high-end kitchen design.
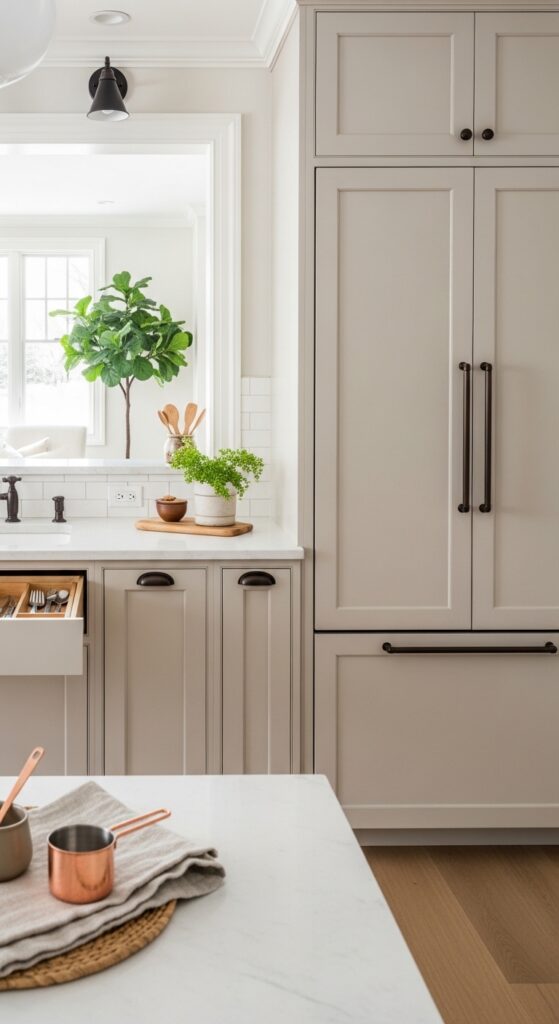
Practically speaking — appliance panels add cost, and they make service calls slightly more complicated since the tech needs to remove the panel first. They also need to be precisely fitted. This is one project where hiring a carpenter makes sense over DIY.
When everything matches, nothing competes — and the whole room calms down.
Get the seamless look:
- Custom-Fit Appliance Panel Mounting Kit — Attach matching cabinet panels to your dishwasher front with adjustable brackets for flush alignment.
- Concealed European Cabinet Hinge Set — Install soft-close, hidden hinges that keep appliance panels operating smoothly.
- Cabinet-Grade Edge Banding in Matching Finish — Cover exposed panel edges with heat-activated, color-matched banding for clean lines.
14. Under-Cabinet Lighting Upgrade with LED Strips
Redoing kitchen cabinets isn’t just about the doors and fronts. Adding LED strip lighting underneath upper cabinets changes how the entire kitchen feels at night. Warm white strips cast a glow on your countertops that makes cooking feel cinematic.
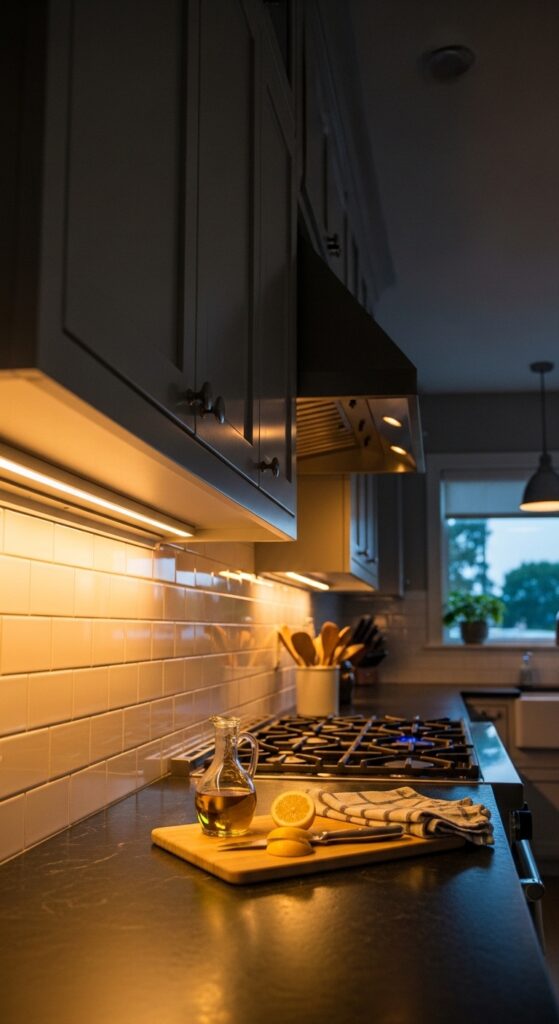
A word of caution — cool white LEDs make kitchens feel like hospitals. Stick with warm white, around 2700K to 3000K. Also, use aluminum channel diffusers to hide the individual LED dots. Bare strips taped under a cabinet look cheap.
Good lighting doesn’t just show your kitchen — it changes how you feel inside it.
Light it up with these:
- Warm White Dimmable LED Strip Kit — Run continuous, even light under your uppers with a cuttable strip rated for kitchen humidity.
- Slim Aluminum LED Channel Diffuser — Hide individual LED dots behind a frosted cover for a smooth, professional glow line.
- Wireless Dimmer Switch for Cabinet Lights — Control brightness and warmth from across the room without running new wall wiring.
15. Tongue-and-Groove Beadboard Panel Inserts
Replace flat center panels in your cabinet doors with beadboard inserts. The vertical lines add cottage texture and make even basic builder-grade cabinets feel intentional. Paint them white for classic charm, or go dark for a moodier take.
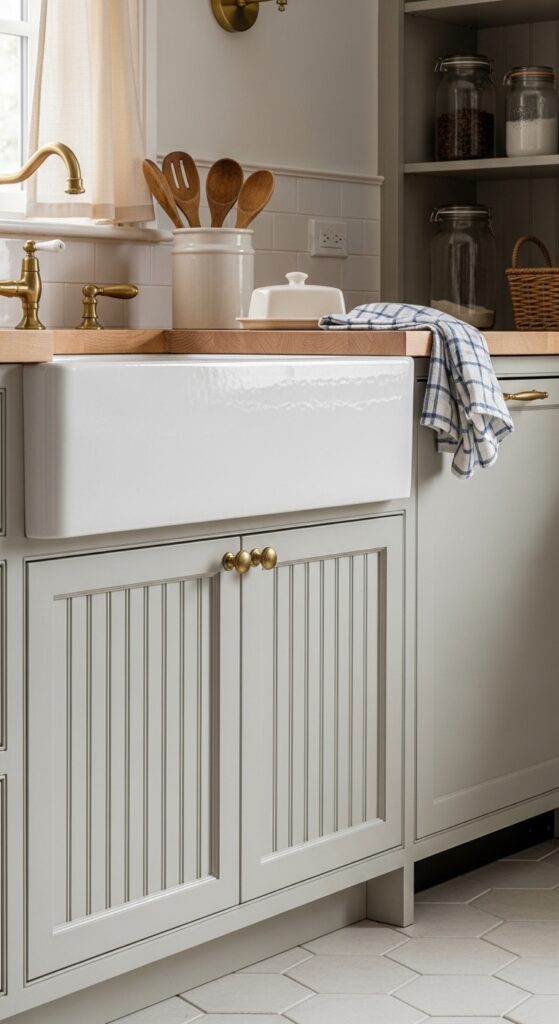
The honest truth — cutting beadboard to fit existing door frames requires precise measurements. If the panel sits even slightly loose, it’ll rattle every time you close the door. Measure twice, cut once, and use thin panel adhesive along with pin nails.
Beadboard turns forgettable cabinets into something your guests notice.
Add the texture with these:
- Pre-Finished Paintable Beadboard Panel Sheets — Cut and insert textured panels into door frames for instant cottage-style detail.
- Ultra-Thin Panel Adhesive for Cabinet Inserts — Bond lightweight panels inside door frames without visible squeeze-out or bulk.
- Flush-Cut Oscillating Saw Blade Set — Trim beadboard panels to exact frame dimensions with precise, clean edges.
16. Cabinet Toe Kick Drawers for Hidden Storage
That empty space under your base cabinets — the toe kick — is wasted real estate. Install slim pull-out drawers there for storing baking sheets, cutting boards, pet bowls, or kids’ step stools. It’s one of those ideas that makes people say, “Why doesn’t every kitchen have this?”
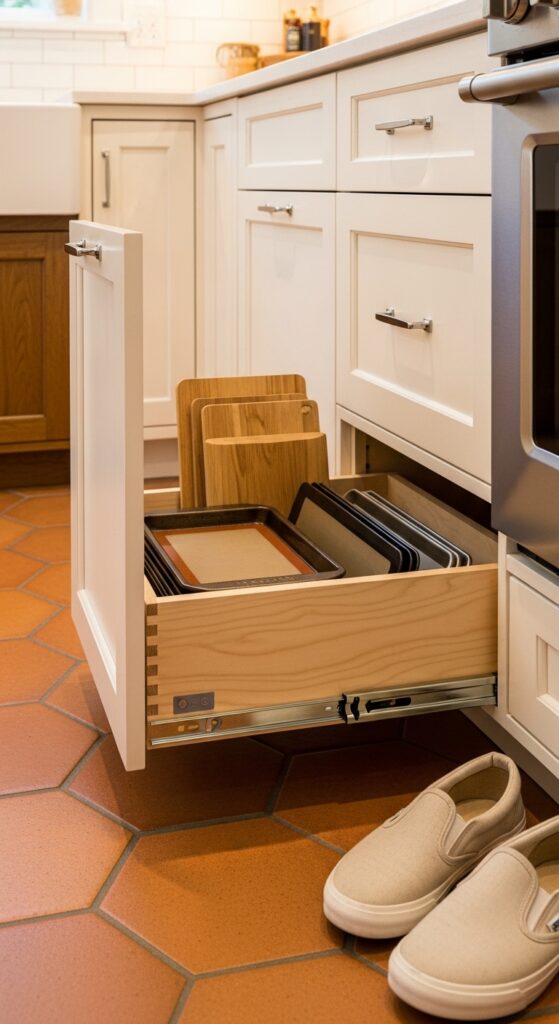
A heads-up — toe kick drawers need perfectly level floors. If your kitchen floor slopes or has tile grout lines, the drawer may stick or scrape. Test the floor with a level before ordering hardware, and use soft-close slides to prevent slamming.
The best storage in a kitchen is the storage nobody sees.
Maximize every inch:
- Low-Profile Toe Kick Drawer Slide Kit — Convert dead space under base cabinets into functional pull-out storage with slim-fit slides.
- Touch-Latch Toe Kick Drawer Opener — Open hidden drawers with a toe tap using a spring-loaded, hardware-free release mechanism.
- Thin Plywood Drawer Box Assembly Set — Build custom-width toe kick drawers from pre-scored, foldable plywood panels.
17. Mixed Material Cabinet Fronts: Wood, Metal, and Cane
Forget matching every single door. Mix in a few cane-webbing inserts, a ribbed glass panel, or a perforated metal front alongside your standard wood doors. This creates a collected, layered look that’s all over designer kitchens right now.
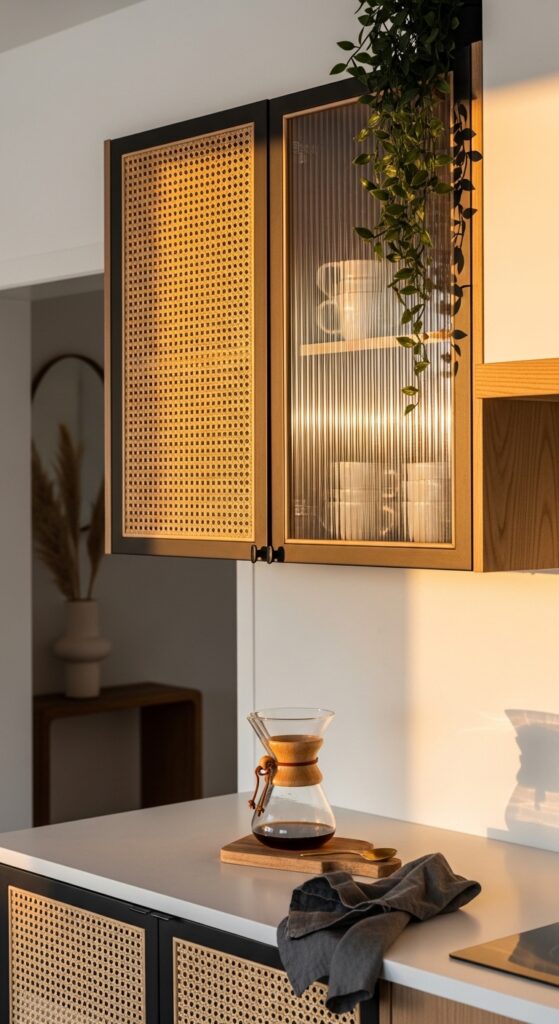
The tricky part — too many materials in one kitchen looks chaotic instead of curated. Stick to a maximum of two or three materials total, and repeat each one at least twice so it feels intentional. One random cane panel surrounded by fifteen wood doors looks like a mistake.
A kitchen with mixed materials tells a story. A kitchen where everything matches tells you nothing.
Mix it up with these:
- Pre-Woven Natural Cane Webbing Roll — Insert rattan cane panels into select cabinet doors for breathable, textured contrast.
- Ribbed Fluted Glass Cabinet Insert Panel — Swap standard glass for vertically ridged panels that add movement and partial concealment.
- Perforated Metal Cabinet Mesh Sheets — Cut and frame industrial metal mesh for an edgy, ventilated door alternative.
InsideMake exists for one reason — to help you love your home more. We bring expert decor insights and room-specific inspiration directly to you.