
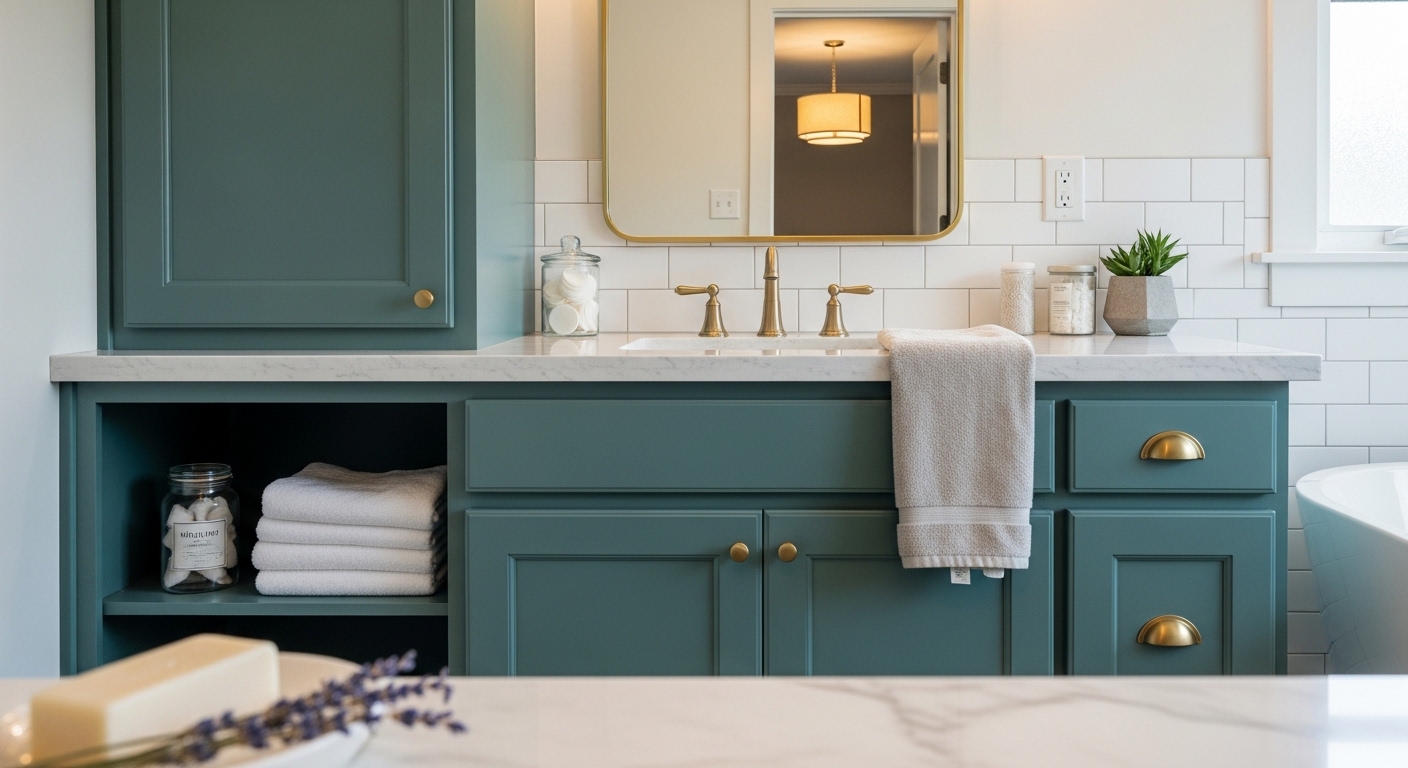

There’s something about tired, builder-grade bathroom cabinets that slowly chips away at your mood every morning. You walk in, flip on the light, and those dated oak or white-box cabinets stare back at you like a renovation you keep putting off.
Here’s the thing — you don’t need a full remodel to fix that. A fresh coat of paint can completely shift the vibe of your bathroom, and it’s one of the most budget-friendly upgrades you can make. If you’ve been looking for smart ways to paint bathroom cabinets, you’re about to find some real inspiration.
Below, you’ll find 9 distinct ideas that go way beyond “just pick a color.” Each one gives you a specific look, a specific approach, and practical details that’ll actually help you pull it off. Let’s get into it.
1. Navy Blue Vanity with Brass Hardware: A Moody Classic
Few combos hit harder than deep navy cabinets paired with warm brass pulls. The dark tone hides water splashes and daily wear better than any light shade, while brass hardware gives the whole setup a collected, vintage feel. Stick with a satin finish for that perfect balance between sheen and practicality.
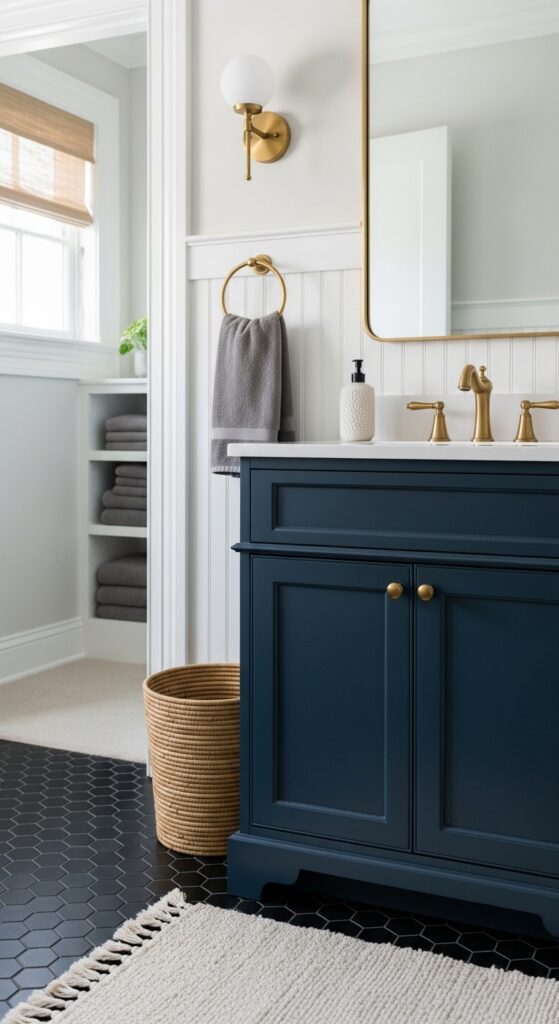
Worth knowing — navy shows dust more than you’d expect, so plan on wiping down surfaces weekly. In small bathrooms with limited natural light, this shade can make the space feel tighter unless you balance it with lighter walls and a well-placed mirror.
Dark paint turns an ordinary vanity into a piece that looks custom-built.
These picks will help you nail this look:
- Smooth-Finish Navy Cabinet Paint — Give your vanity a rich, lasting color with self-leveling formula for streak-free coverage.
- Vintage Brass Cabinet Pull Set — Warm up your navy cabinets with aged brass handles for an heirloom-worthy finish.
- Fine-Grit Sanding Sponge Pack — Prep your cabinet surfaces evenly with flexible sponges for smooth paint adhesion.
2. Two-Tone Cabinets: Upper Shelves Light, Lower Base Dark
Painting your upper and lower cabinets in two different shades creates built-in visual depth that makes even a small bathroom feel designed. Try a crisp white or soft cream on top with a charcoal or forest green base. The contrast draws the eye down and grounds the room.
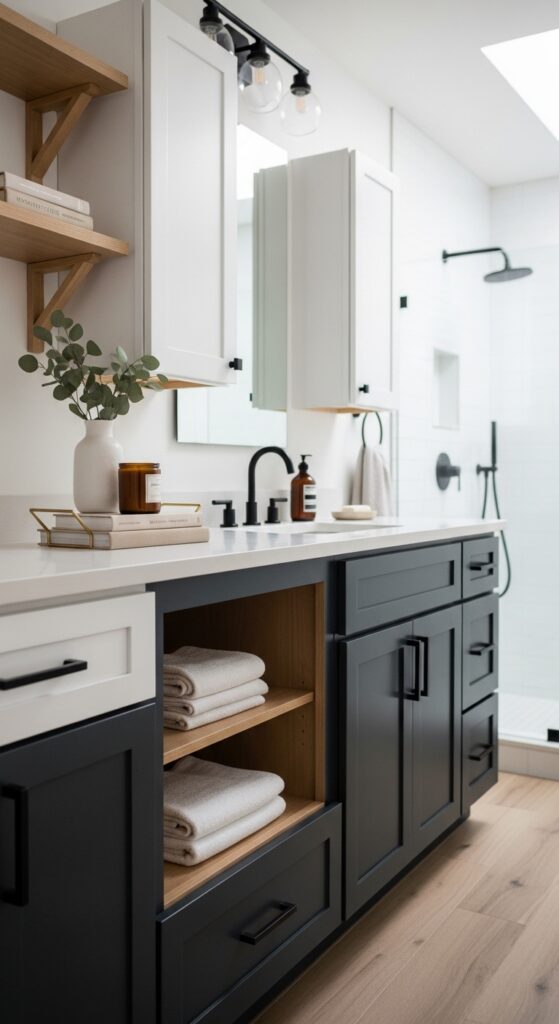
Be realistic though — getting that dividing line clean takes patience and good painter’s tape. You’ll need at least two rounds of taping and touching up. If your cabinets have visible hinges, make sure the color split makes sense with where doors meet frames.
Two tones do what one color can’t — they give a small room real architecture.
Here’s what’ll make this project easier:
- Professional-Grade Painter’s Tape Roll — Create crisp color-break lines between your two tones with clean-release adhesive for sharp edges.
- Compact Foam Roller Set — Reach tight cabinet surfaces smoothly with mini rollers designed for detailed furniture painting.
- Creamy White Cabinet Enamel Paint — Coat your upper cabinets with a durable, self-priming formula for lasting brightness.
3. Sage Green Vanity for a Spa-Inspired Retreat
Sage green has quietly become the go-to for bathrooms that want to feel calm without going sterile. It pairs beautifully with white countertops, wood accents, and even terrazzo tile. The muted warmth of sage makes your bathroom feel like a place you want to linger — not just rush through.
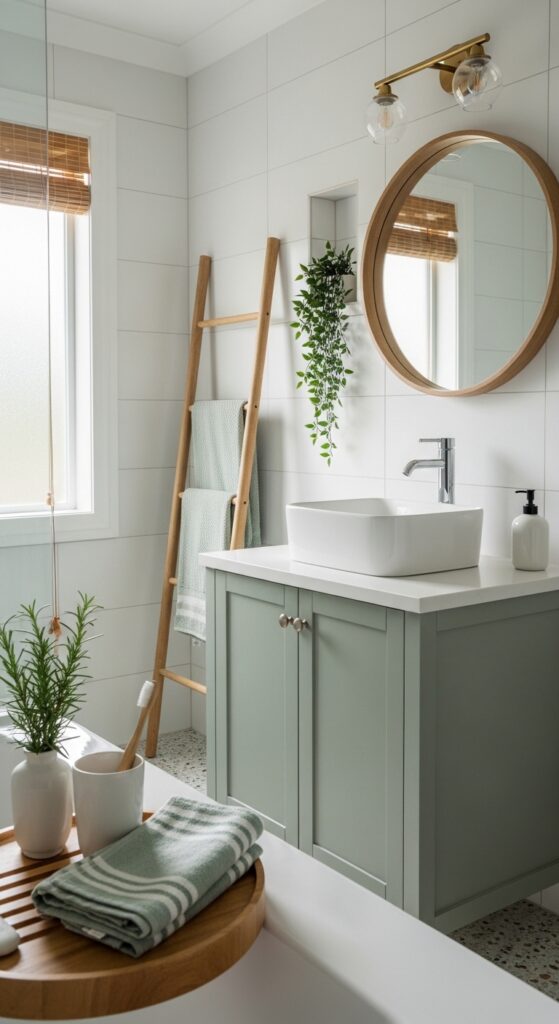
One thing to watch — sage reads very differently depending on your lighting. Under warm bulbs, it leans almost gray. In cool daylight, the green pops more. Always test a swatch on the actual cabinet door and check it at morning, midday, and evening before committing.
Sage doesn’t shout — it whispers, and that’s exactly why it works in a bathroom.
These’ll help you pull off the spa look:
- Muted Sage Satin Cabinet Paint — Bring soft, earthy calm to your vanity with a wipeable satin finish built for humid rooms.
- Brushed Nickel Minimalist Knob Set — Keep the hardware understated with sleek nickel knobs that complement green tones perfectly.
- Clear Matte Protective Topcoat Sealer — Lock in your sage finish with a non-yellowing topcoat for long-term water resistance.
4. Chalk-Painted Cabinets with Distressed Edges for Farmhouse Charm
If you love that lived-in, cottage-style look, chalk paint is your best friend. It grips almost any surface without heavy sanding, dries fast, and gives you a velvety matte finish that photographs beautifully. Once dry, lightly sand the corners and edges with fine-grit paper to expose bits of the wood or previous color underneath.
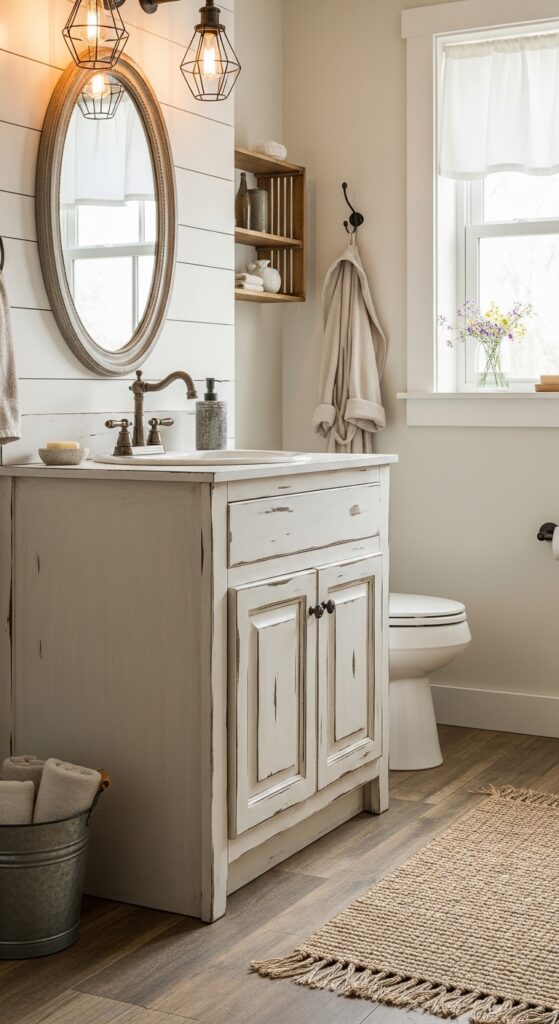
Fair warning — chalk paint without a wax or poly topcoat will stain and absorb water quickly. Bathrooms are humid spaces, so sealing is non-negotiable. Plan on reapplying wax every six months or skip it entirely and use a water-based poly for less maintenance.
Imperfection is the whole point — distressed edges make a bathroom feel collected, not decorated.
Grab these for your farmhouse cabinet makeover:
- Matte Chalk Finish Furniture Paint — Get that signature velvety texture on your cabinets without stripping or heavy prep work.
- Clear Finishing Wax Protective Sealant — Seal and protect your chalk-painted surfaces with a soft-sheen wax for moisture defense.
- Angled Detail Paint Brush Set — Reach every groove and panel edge with precision brushes made for furniture refinishing.
5. High-Gloss Black Cabinets for a Bold, Modern Edge
Nothing makes a statement quite like glossy black cabinets in a bathroom. They reflect light, make hardware pop, and give even a basic vanity a designer-level presence. Pair them with white walls and chrome fixtures for a classic contrast, or lean into the drama with dark walls and gold accents.
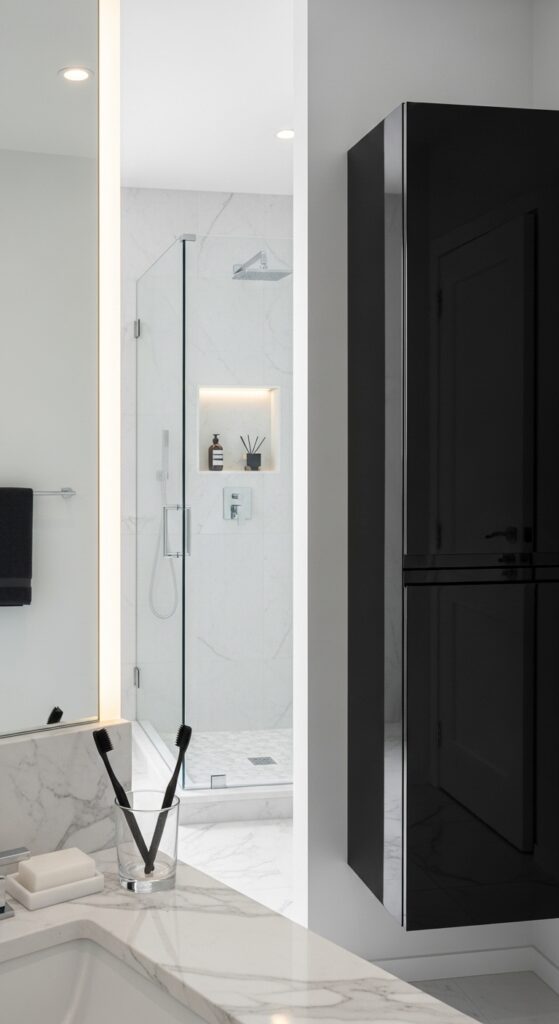
Here’s the honest truth — high-gloss finishes show every fingerprint, water droplet, and speck of dust. In a bathroom, that means daily wiping if you want them looking sharp. Prep work matters twice as much here, because gloss amplifies every surface imperfection. Sand thoroughly and use a high-build primer.
Gloss doesn’t hide flaws — it rewards the prep work you put in.
These products set you up for a flawless black finish:
- Ultra-Gloss Black Enamel Cabinet Paint — Achieve mirror-like depth on your vanity with a fast-curing, scrubbable enamel formula.
- High-Build Bonding Primer for Cabinets — Cover grain and old finishes completely with a thick primer that creates a glass-smooth base.
- Microfiber Lint-Free Finishing Cloth Pack — Keep your glossy cabinets spotless between cleanings with streak-free microfiber cloths.

6. Ombre Gradient Vanity: Subtle Color Fade from Top to Bottom
This one’s for the creatives. An ombre effect — where color gradually fades from dark at the top to light at the bottom or vice versa — turns a boring vanity into actual art. It works best with blues, greens, or grays. Use three shades from the same color card and blend where they meet with a damp brush or sponge.
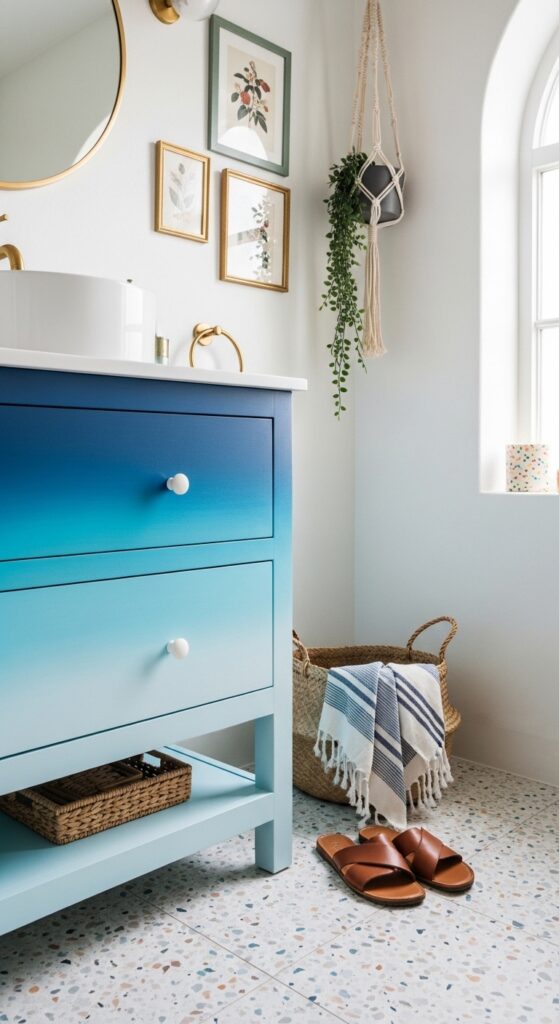
Honestly, this technique has a learning curve. Practice on cardboard first. Blending wet paint before it dries takes speed and confidence, and bathroom cabinets don’t give you much surface area to work with. If the transition looks choppy, a light dry-brush pass while everything’s still wet can save it.
Gradient paint makes people stop and ask how you did it — and that’s the whole point.
Stock up on these before you start blending:
- Three-Shade Blue Paint Sample Trio — Test and blend your gradient with coordinated hues from the same color family.
- Natural Sea Sponge Blending Set — Create seamless color transitions on your cabinets with soft, irregular sponge textures.
- Slow-Dry Paint Extender Additive — Buy yourself more blending time by slowing your paint’s drying speed for smoother gradients.
7. Stenciled Pattern Cabinets for a Custom Tile Look
Why tile the inside of your open shelving when you can paint bathroom cabinets with a stenciled pattern that mimics the same effect? Moroccan-inspired motifs, simple geometric repeats, or even a subtle damask pattern on flat-panel doors can make your vanity look like a custom piece. Use a contrasting shade over your base color and a dense foam roller for clean stencil lines.
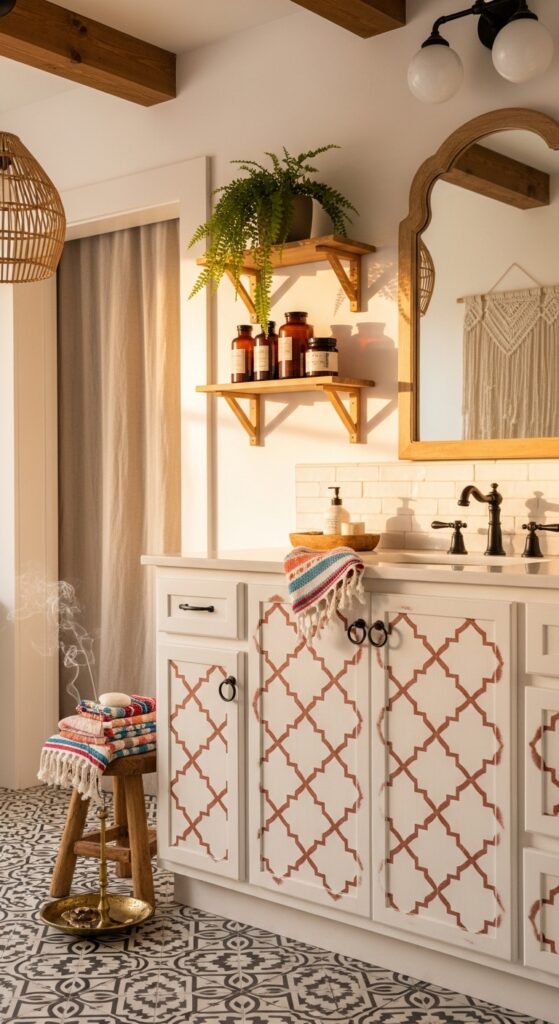
Something to keep in mind — stencils shift. Even with spray adhesive on the back, detailed patterns can smudge if you rush. Work one small section at a time, lift the stencil straight up (never slide), and let each repeat dry before moving the stencil next to it. Patience is everything.
A $12 stencil can make your cabinets look like a $1,200 custom job.
These tools make stenciling way less stressful:
- Reusable Moroccan Tile Stencil Template — Add intricate pattern detail to your cabinet faces with a washable, repositionable stencil.
- Dense Foam Stencil Roller Kit — Apply paint through stencil cutouts with minimal bleed for crisp, consistent pattern lines.
- Repositionable Stencil Spray Adhesive — Hold your stencil flat against cabinet surfaces without residue for clean, smudge-free results.
8. Whitewashed Wood Cabinets for Coastal, Airy Softness
Whitewashing is the move when you want to paint bathroom cabinets but still let the wood grain show through. Mix white paint with water at a roughly 1:1 ratio, brush it on, and then wipe back with a rag before it dries. The result is this beautiful, sun-bleached effect that screams beach house without being over the top.
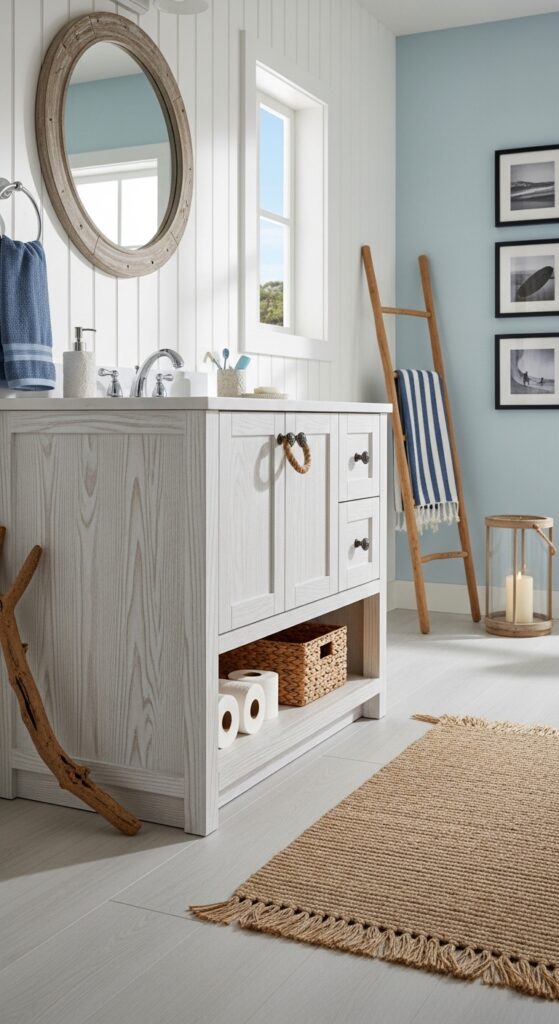
A practical heads-up — whitewash only looks good on real wood or quality wood veneer. Laminate and thermofoil surfaces won’t absorb the thinned paint the same way, and you’ll end up with a streaky, peeling mess. If your cabinets aren’t solid wood, consider a different approach from this list instead.
Whitewash lets the wood tell its own story while you just soften the volume.
These’ll help you get that effortless coastal finish:
- Bright White Flat Latex Base Paint — Thin down to your preferred opacity for customizable whitewash coverage on wood grain.
- Lint-Free Cotton Staining Rag Bundle — Wipe back wet whitewash evenly with absorbent, non-shedding cloths for controlled grain reveal.
- Water-Based Matte Wood Finish Sealer — Protect your whitewashed cabinets from bathroom humidity with a breathable, clear matte coat.
9. Color-Blocked Cabinet Doors with Painted Interior Surprise
Here’s an idea most people miss — paint the outside of your cabinet doors in one neutral shade, but paint the inside a bold, unexpected color. Think matte black exterior with a sunflower yellow interior, or soft gray outside with coral inside. Every time someone opens a door, there’s a little moment of joy.
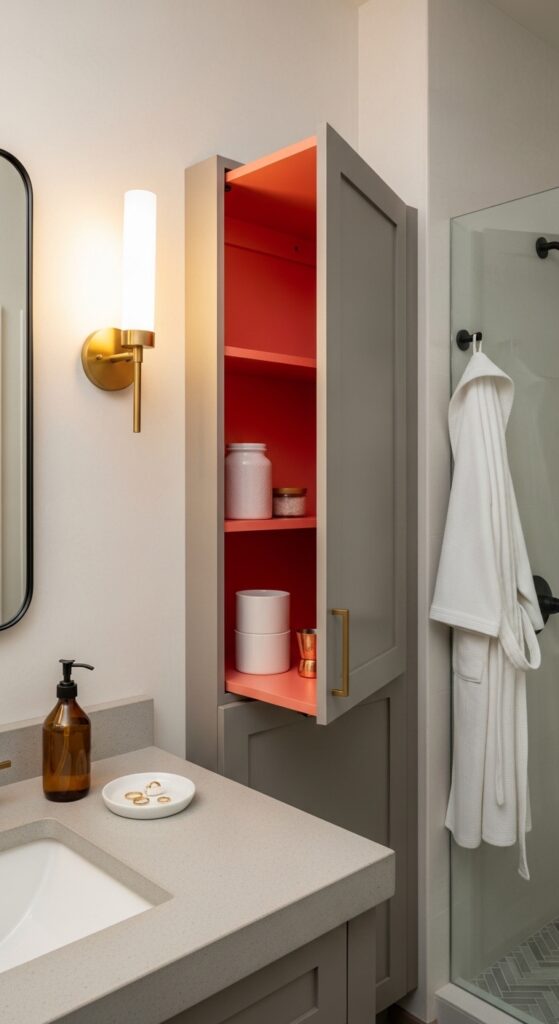
The tricky part — you need to tape off the edges perfectly where the two colors meet on the door’s edge. Depending on your cabinet style, that edge might be rounded, which makes clean lines harder. Use flexible painter’s tape and press it firmly into any curves. Two thin coats beat one thick coat for avoiding drips on vertical interior surfaces.
The best design surprises are the ones people discover by accident.
Grab these to make your color-block pop:
- Bold Accent Interior Cabinet Paint — Add a hidden burst of personality inside your cabinet doors with a vibrant, scrubbable formula.
- Flexible Edge Painter’s Tape Roll — Wrap around curved cabinet door edges cleanly with stretch-friendly tape for perfect two-tone lines.
- Small Detail Touch-Up Brush Kit — Fix any bleed spots along color-block borders with precision tip brushes for flawless edges.

InsideMake exists for one reason — to help you love your home more. We bring expert decor insights and room-specific inspiration directly to you.