
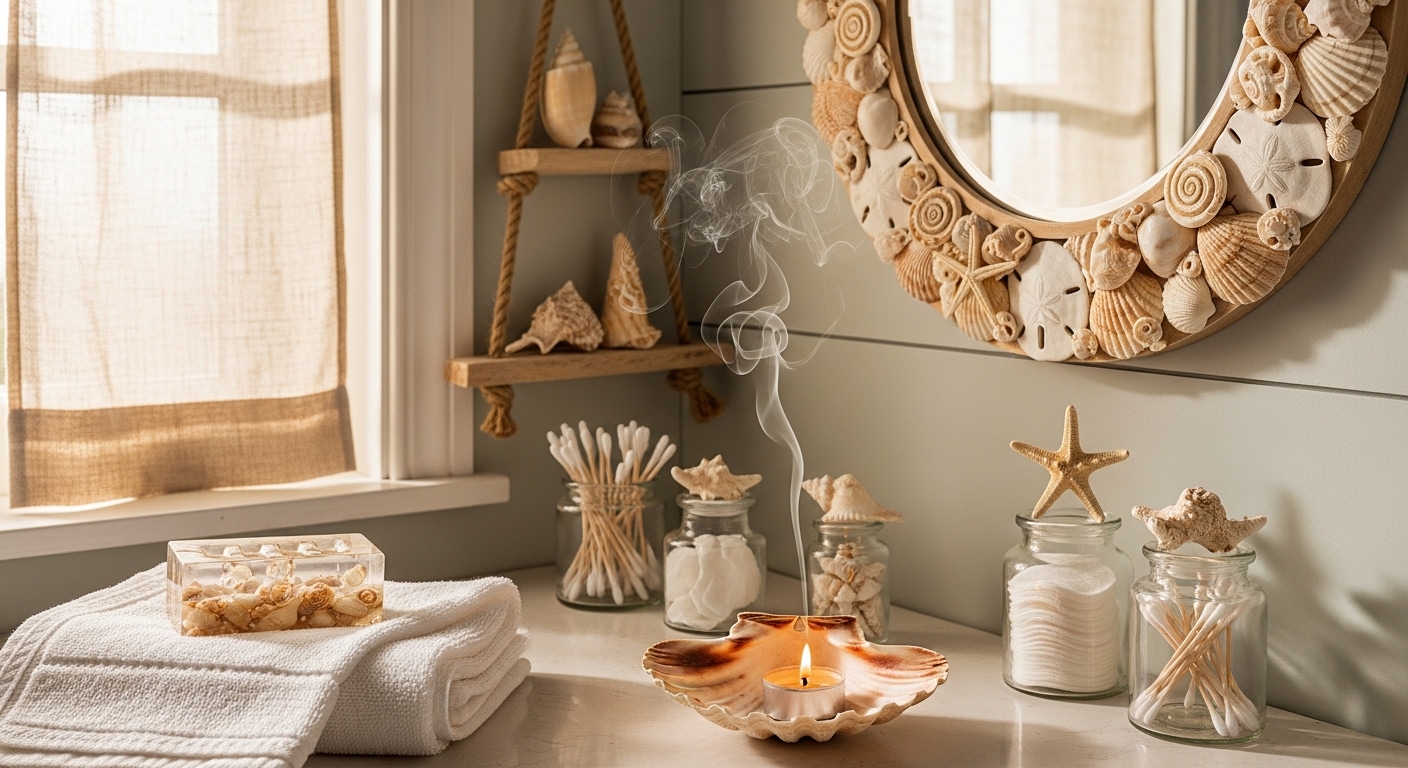

There’s something about picking up a seashell on the beach that makes you want to hold onto that feeling forever. You slip it in your pocket, bring it home, and then it sits in a junk drawer for years. Sound familiar?
If you’ve been collecting shells with no real plan, your bathroom is the perfect place to finally put them to use. Bathroom seashell craft ideas give you a way to bring that salty, sun-soaked energy into a space you use every single day — without spending a fortune or hiring a designer.
What you’ll find below are 11 distinct, easy-to-pull-off projects that range from quick weekend crafts to slightly more involved pieces. Each one works on its own, so pick the idea that matches your style and run with it.
1. Seashell-Framed Vanity Mirror: Coastal Glamour for Small Spaces
A plain vanity mirror gets a serious personality upgrade when you ring it with collected shells. Hot glue a mix of sizes — sand dollars, scallops, tiny spirals — around the frame in an asymmetrical pattern. The trick is overlapping a few pieces so it looks gathered, not glued by a robot.
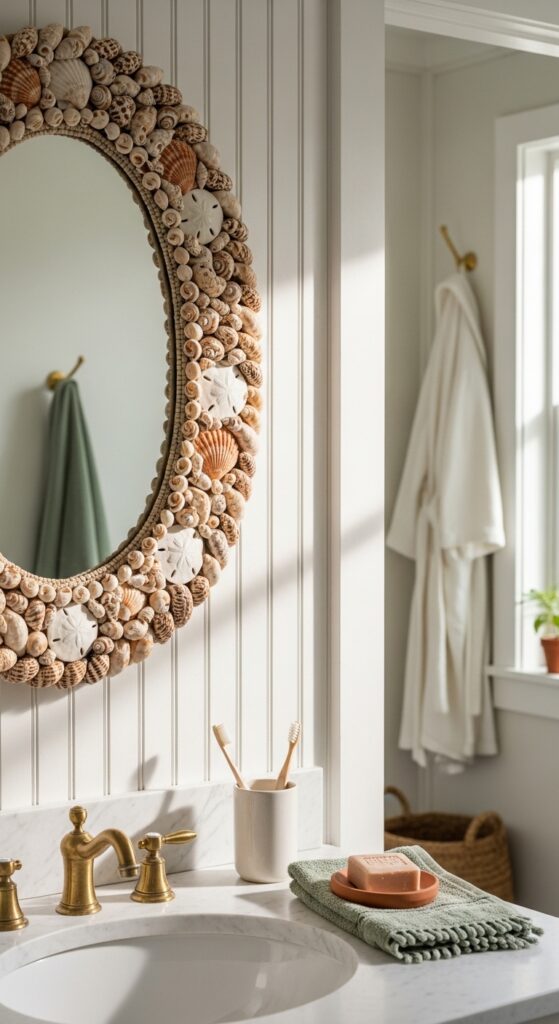
Worth knowing — the humidity in bathrooms can weaken hot glue bonds over time. Use E6000 or marine-grade adhesive if your bathroom gets really steamy, and let it cure for a full 24 hours before hanging.
A mirror framed in seashells turns every morning into a small vacation.
Here are a few things that’ll help you pull this off:
- Coastal Decorative Assorted Seashell Collection — Fill your vanity frame with a ready-mixed variety of ocean-tumbled shells for natural, layered texture.
- Heavy-Duty Waterproof Craft Adhesive Tube — Bond your shells permanently to any mirror frame with moisture-resistant hold for lasting bathroom durability.
- Frameless Round Beveled Wall Mirror — Start with a clean, simple base mirror that gives you maximum edge space for creative shell placement.
2. Hand-Poured Shell Soap Dish: Functional Art for Your Sink
Pour clear resin into a silicone mold, drop a few small shells and a pinch of sand into the mix, and you’ve got a soap dish that looks like a tide pool froze in time. The transparency of the resin lets light pass through, which makes bathroom seashell craft ideas like this one feel almost gallery-worthy.
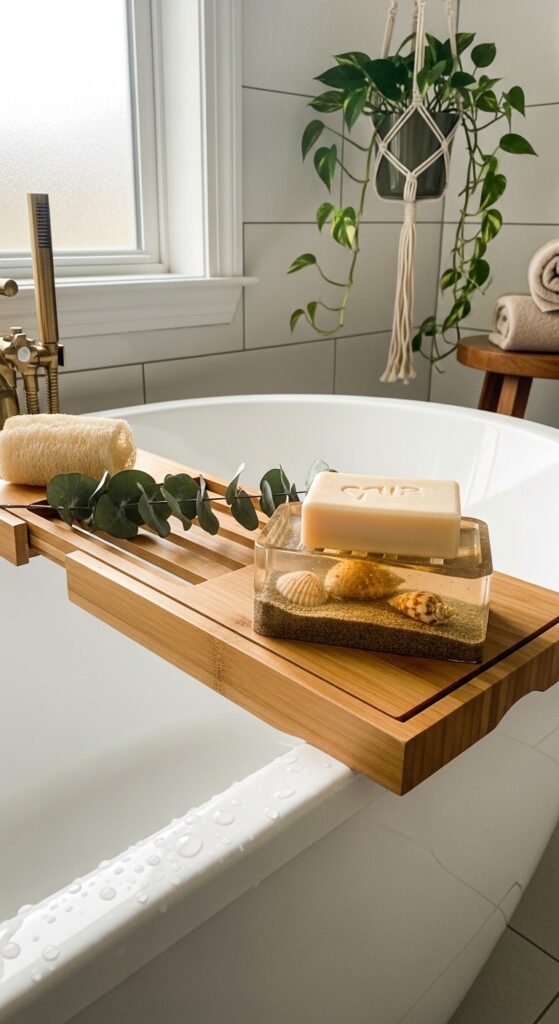
Be realistic though — resin work has a learning curve. Your first pour might have bubbles or cloudy spots. Work in a well-ventilated area, use a heat gun to pop surface bubbles, and don’t rush the curing time.
Functional craft hits different when you actually use it every day.
These supplies make the process smoother:
- Crystal Clear Epoxy Resin Starter Kit — Create a glass-like soap dish with self-leveling resin that highlights every shell detail beautifully.
- Flexible Silicone Rectangle Mold Set — Shape your resin soap dish with easy-release molds designed for smooth, professional-looking edges.
- Fine Natural Beach Sand Bag — Add an authentic ocean-floor layer beneath your shells with real, pre-cleaned sand for realistic depth.
3. Driftwood and Shell Towel Rack: Rustic Meets Beachy
Grab a thick piece of driftwood, screw in some brass hooks along the bottom, and hot glue a scattering of shells along the top and sides. Mounted above your towel bar or beside the shower, it turns a boring wall into something worth noticing. The raw texture of the wood against smooth shells creates a contrast that feels collected over years, not bought at a big-box store.
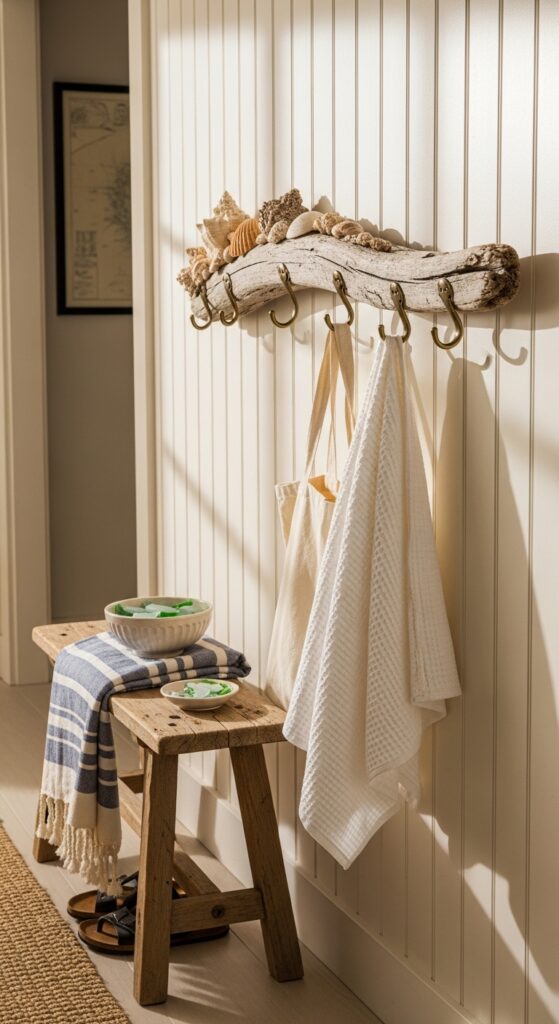
One thing to watch — driftwood can harbor tiny insects or moisture. Bake it at 200°F for about two hours and seal it with a matte polyurethane before bringing it indoors.
Nature already designed the best towel rack — you just have to mount it.
Grab these to get started:
- Natural Driftwood Branch Wall Piece — Mount a pre-cleaned, sturdy driftwood piece that’s ready for hooks and shell detailing right away.
- Antique Brass Screw-In Wall Hooks — Attach vintage-style hooks to your driftwood for towels that hang with real coastal character.
- Matte Finish Waterproof Wood Sealant — Protect your driftwood from bathroom moisture with a breathable, invisible coat that prevents warping.
4. Seashell Tealight Candle Holders: Warm Glow, Zero Effort
Large scallop or clam shells are already shaped like little bowls — pour melted soy wax right into them with a pre-tabbed wick, and you’ve got the simplest bathroom seashell craft ideas on this list. Line three or four along the edge of your tub for an instant spa vibe.
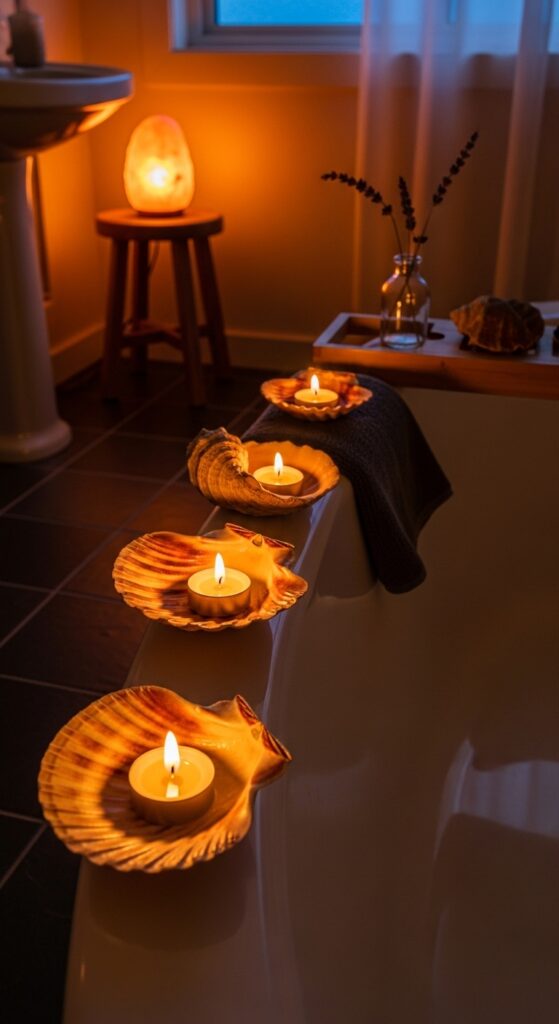
Fair warning — thin shells can crack from the heat of a burning candle. Pick shells that are at least a quarter-inch thick, and never leave them unattended. A battery-operated tealight works too if you want the look without the flame.
Sometimes the best craft is the one that takes fifteen minutes and looks like it took hours.
Everything you need is right here:
- Natural Soy Wax Flakes Candle Supply — Pour clean-burning, eco-friendly wax directly into your shell holders for a soft, even glow.
- Pre-Tabbed Cotton Candle Wick Pack — Drop a ready-to-use wick into each shell so your candle burns centered and steady every time.
- Large Natural Scallop Shell Set — Use deep, sturdy scallop shells as instant candle vessels with a beautiful ridged texture.
5. Shell-Embedded Bathroom Tile Border: Permanent Coastal Detail
If you’re handy with thin-set mortar, press small flat shells into the grout line of a tile border during installation or a re-grout job. This works especially well as a narrow accent strip around the shower niche or behind the faucet. It’s subtle enough to look intentional, not kitschy.
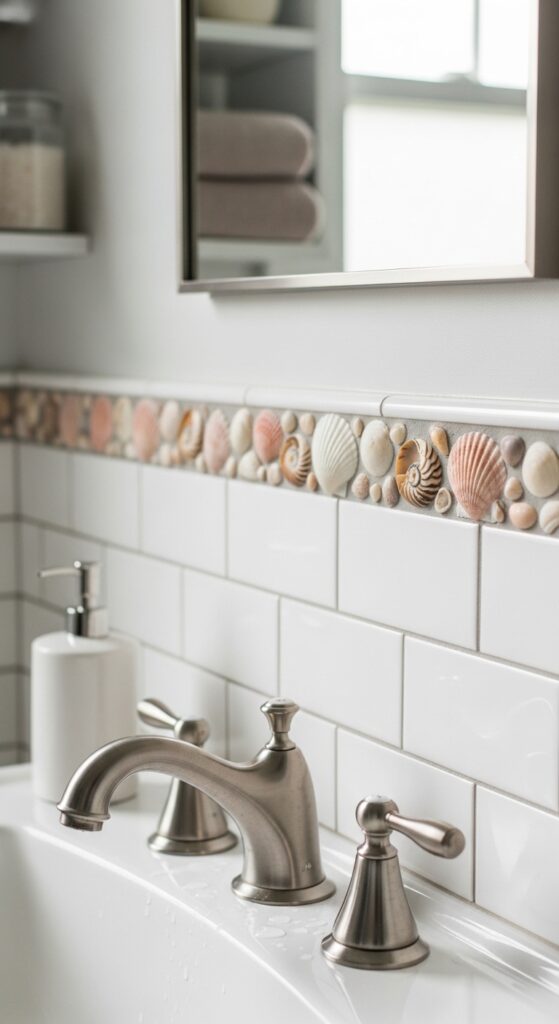
Keep expectations honest here — this is a semi-permanent modification. If you’re renting, skip this one. And shells embedded in grout need to be sealed properly or they’ll discolor and trap soap scum in the crevices.
The best accents don’t scream for attention — they reward the people who notice.
These will help you nail it:
- Small Flat Polished Shell Assortment — Press smooth, uniform shells into your tile border for a clean, mosaic-style coastal accent.
- Waterproof Grout Sealer Spray Bottle — Seal your shell-embedded grout lines against moisture and staining with one easy application.
- Precision Thin-Set Mortar Trowel Tool — Apply mortar neatly around each shell with a slim, angled trowel built for detailed tile work.
6. Hanging Seashell Wind Chime for the Window: Sound Meets Style
Drill tiny holes near the top of each shell, thread fishing line through, and tie them at varying lengths to a piece of driftwood or a wooden dowel. Hang it near the bathroom window where a breeze can catch it. The soft clicking sound is genuinely calming — not the aggressive clanging of metal chimes.
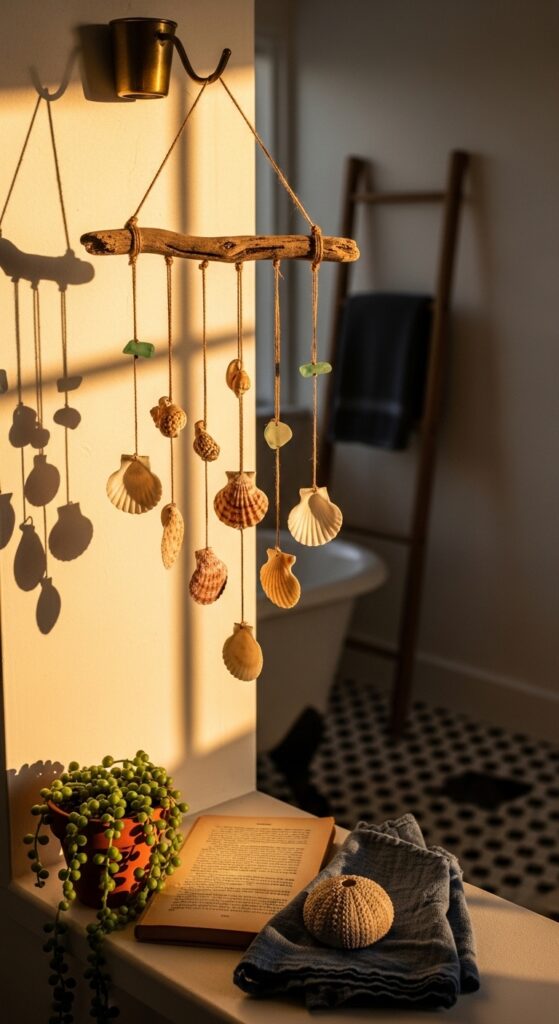
Something to keep in mind — drilling shells requires patience and a very slow speed. Use a small diamond-tipped drill bit and keep the shell wet while drilling to prevent cracking. Go too fast and the shell shatters.
A breeze through shells sounds exactly like the ocean remembers you.
Pick up these to build yours:
- Diamond-Tipped Small Drill Bit Set — Drill clean, crack-free holes through delicate shells with precision bits designed for fragile materials.
- Heavy-Duty Clear Fishing Line Spool — String your shells on invisible, strong line that holds weight without stealing attention from the design.
- Smooth Round Wooden Dowel Rod — Hang your shell strands from a clean, paintable dowel that anchors the whole chime together.



7. Seashell-Topped Storage Jars: Pretty and Practical
Take those plain glass apothecary jars you use for cotton balls and swabs, then hot glue a large statement shell — a conch, a starfish, or a sand dollar — right on the lid. It’s a two-minute project that makes your bathroom counter look curated instead of cluttered.
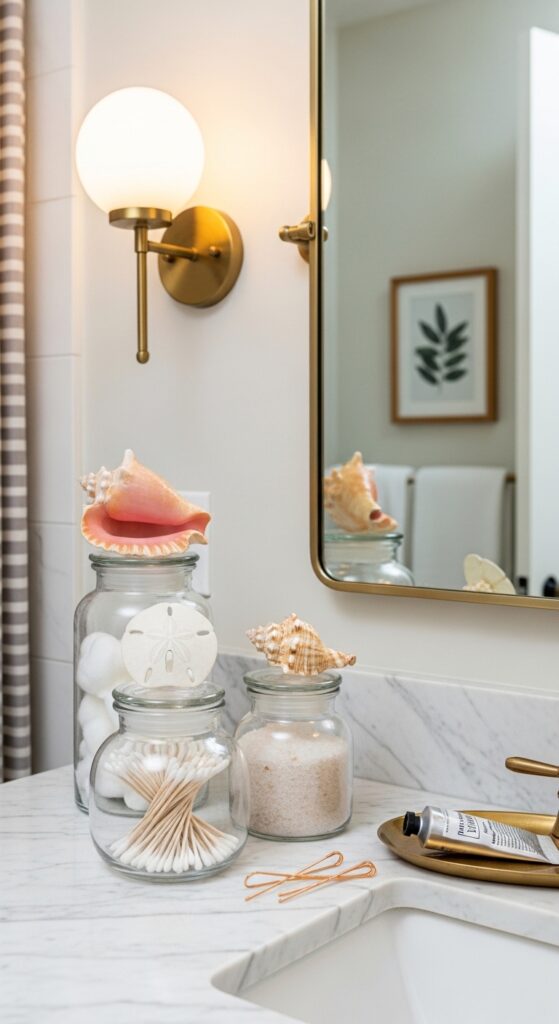
A heads up though — starfish and sand dollars are fragile. The lid will get twisted and lifted daily, so choose a thick shell that can handle regular use without chipping.
The smallest change to an everyday object makes you see the whole room differently.
Here’s what makes it work:
- Clear Glass Apothecary Jar Trio — Store your bathroom essentials in elegant, lidded jars that are ready for a custom shell topper.
- Large Natural Conch Shell Specimen — Crown your jar with a single dramatic shell that turns basic storage into a design statement.
- Quick-Dry All-Purpose Craft Glue — Bond shells to glass or ceramic lids securely with a fast-setting adhesive that dries crystal clear.
8. Seashell Mosaic Backsplash Panel: DIY Art That Pops
Arrange small shells in a tight pattern on a flat piece of marine plywood or a thick canvas board, grout between them like you would with tiles, and mount it behind your bathroom sink. The result looks like a custom backsplash without the commitment of permanent tile work. Mix shell types for a textured feel, or stick to one variety for a cleaner look.
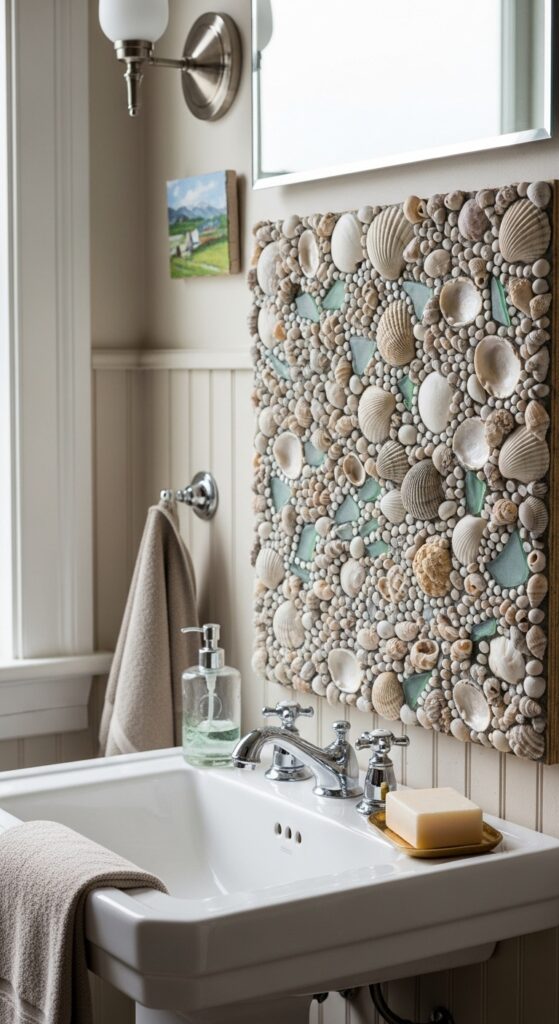
Just so you know — grouting around irregular shell shapes gets messy. Tape off anything you don’t want grout on, work in small sections, and wipe excess grout before it dries. It’s forgiving, but sloppy grout lines are hard to fix once set.
Mosaic is just patience arranged into something beautiful.
These supplies make it easier:
- Pre-Sanded Waterproof Grout Mix Bag — Fill the gaps between your shells with smooth, moisture-proof grout for a polished mosaic finish.
- Marine-Grade Plywood Craft Board — Build your mosaic on a water-resistant base that won’t warp or rot in bathroom humidity.
- Soft Rubber Grout Float Tool — Spread grout evenly into every shell crevice with a flexible float that won’t scratch your work.
9. Shell-Wrapped Bathroom Wastebasket: Unexpected Texture
Nobody expects a wastebasket to be interesting, which is exactly why this project hits. Glue a dense layer of small shells — cowries, moon snails, button shells — around the outside of a plain metal or ceramic wastebasket. Start from the bottom and work up in rows. The end result looks intentional and surprisingly high-end.
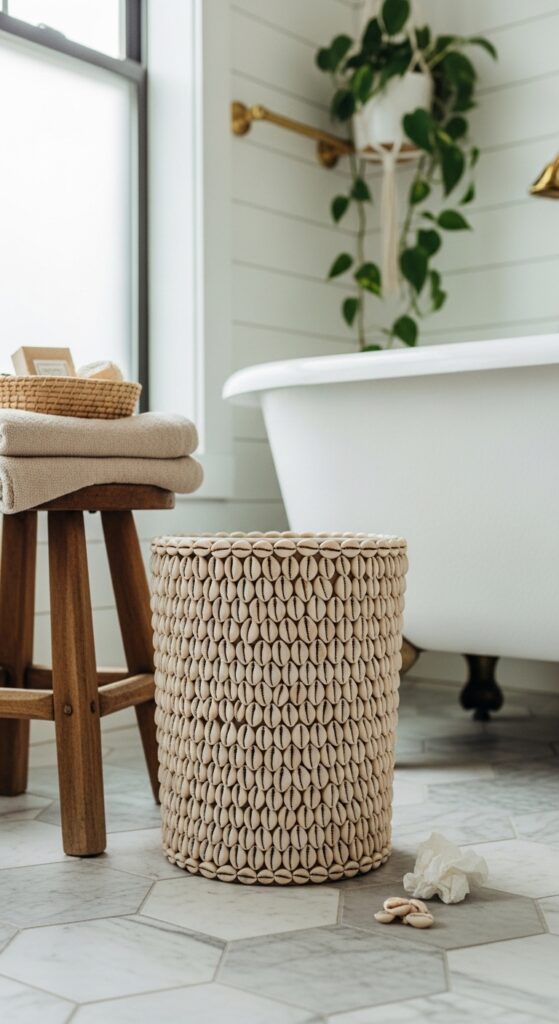
Real talk — a fully covered wastebasket uses a lot of shells. You’ll need several hundred small ones to cover a standard-sized bin. Start collecting now or buy in bulk, because running out halfway through is frustrating.
The most overlooked object in the room becomes the one people ask about.
Stock up on these:
- Bulk Small Mixed Cowrie Shell Bag — Cover your wastebasket surface with hundreds of uniform, naturally patterned shells for full, even coverage.
- Sleek Matte Metal Wastebasket Bin — Start with a smooth, simple bin that gives shells a clean surface to grip without competing textures.
- Industrial Strength Multi-Surface Adhesive — Lock every shell in place on metal or ceramic with a bond that survives bumps and daily bathroom use.
10. Nautical Shell Rope Shelf: Display and Storage Combined
Wrap a narrow wooden shelf in thick jute or sisal rope, attach it to the wall with rope-wrapped brackets, and arrange shells along the surface as decorative bookends or standalone displays. This works beautifully above the toilet or beside the mirror — spots that usually go unused but beg for personality.
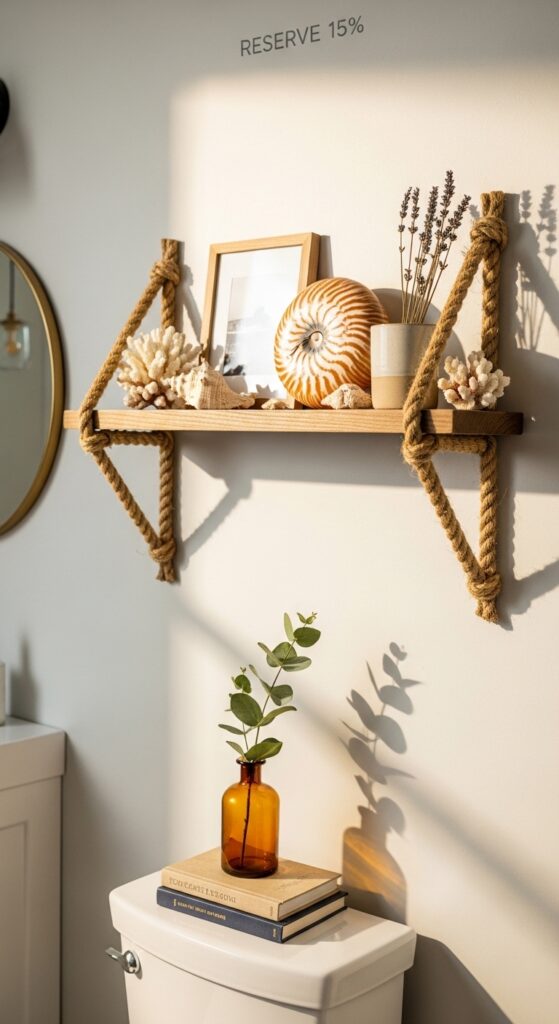
Practically speaking — rope-wrapped shelves collect dust like magnets. A quick blast with compressed air every couple of weeks keeps things looking fresh. And don’t overload it; rope brackets are for display, not heavy storage.
Give every shell a stage and suddenly your bathroom tells a story.
Build it with these:
- Natural Jute Rope Thick Craft Spool — Wrap your shelf and brackets in textured, coastal-style rope that sets the whole nautical tone.
- Floating Wood Display Wall Shelf — Mount a clean, sturdy shelf that’s the right depth for shells, candles, and small bathroom décor.
- Compressed Air Duster Can Multi-Pack — Keep your rope shelf and shell displays dust-free with a quick, easy spray every few weeks.
11. Seashell Bathroom Door Wreath: First Impression Charm
Hot glue a variety of shells — mixing sizes, shapes, and tones — onto a grapevine or foam wreath form, and hang it on the inside of your bathroom door or on the wall beside it. Most people think of wreaths as front-door décor, but a shell wreath inside the bathroom ties the whole coastal theme together the second someone walks in.
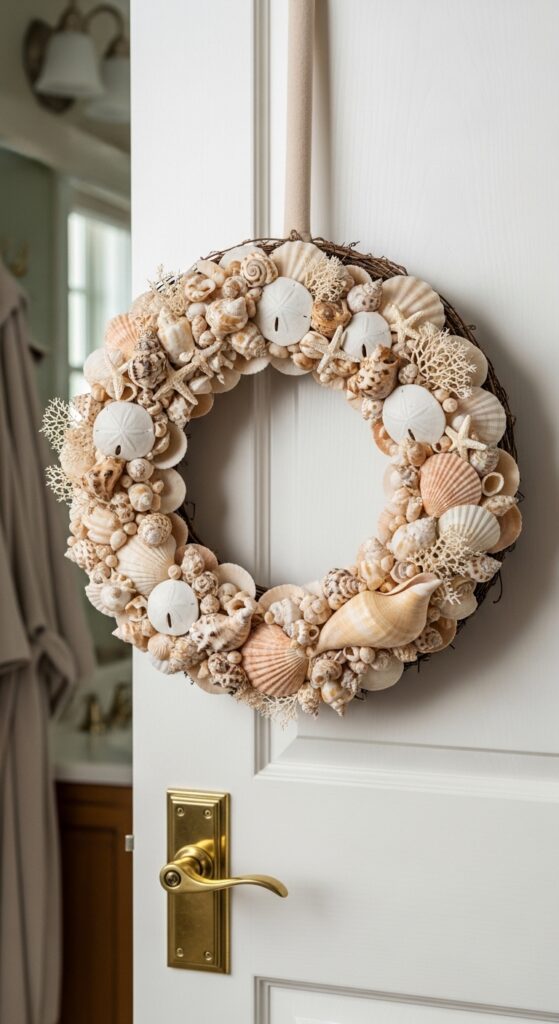
One real consideration — bathroom door wreaths get bumped every time the door opens. Use a sturdy wreath base and avoid gluing on anything too delicate or top-heavy. Reinforce the big pieces with extra adhesive on the back.
A wreath isn’t just for the front door — it’s for any room that deserves a welcome.
Here’s what you’ll need:
- Natural Grapevine Wreath Form Base — Start with a lightweight, textured wreath base that holds shells securely and adds organic coastal depth.
- Assorted Jumbo Decorative Shell Pack — Fill your wreath with a striking mix of large, eye-catching shells that create visual drama up close.
- Padded Over-the-Door Wreath Hanger — Display your finished wreath without nails or holes using a scratch-free hanger that fits standard doors.

InsideMake exists for one reason — to help you love your home more. We bring expert decor insights and room-specific inspiration directly to you.