
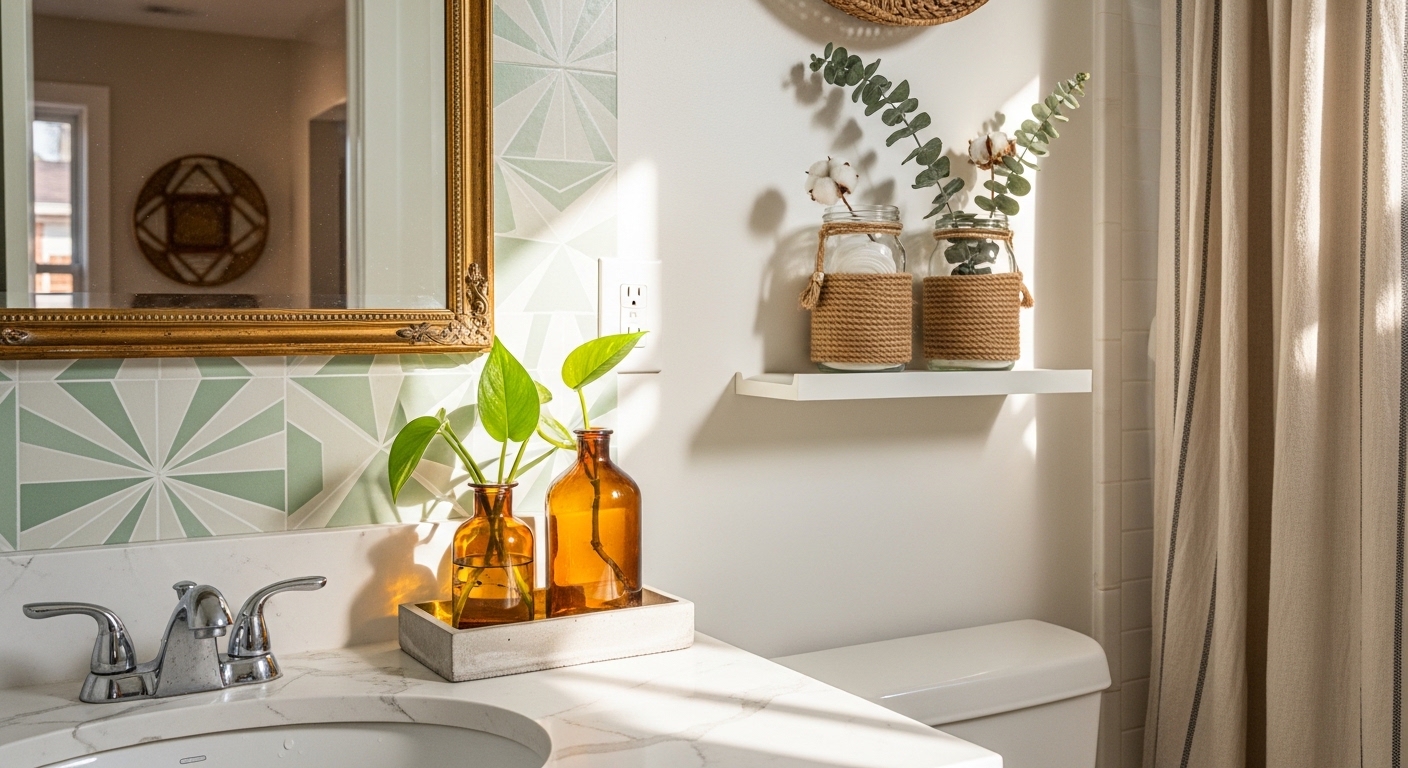

There’s something about a bathroom that still looks the same as the day you moved in. You walk past it twice a day, maybe more, and each time there’s this quiet nudge — it could be better. It could feel like yours.
If you’re craving a space that actually reflects your style without calling a contractor or draining your savings, you’re in the right place. DIY bathroom decor is one of the fastest ways to make a tired bathroom feel completely fresh — and you don’t need fancy tools or a design degree to pull it off.
Below, you’ll find 9 creative ideas that range from simple weekend swaps to slightly more involved projects. Each one stands on its own, so grab whichever speaks to you and run with it.
1. Hand-Painted Accent Tile Wall: A Bold Focal Point Behind Your Vanity
You don’t need to rip out existing tile to get a custom look. Hand-painting a geometric or botanical pattern directly onto plain tiles using specialty tile paint gives your vanity wall a designer feel for under twenty dollars. A small stencil and steady hand are all it takes — pick a two-tone palette that ties into your towels or shower curtain.
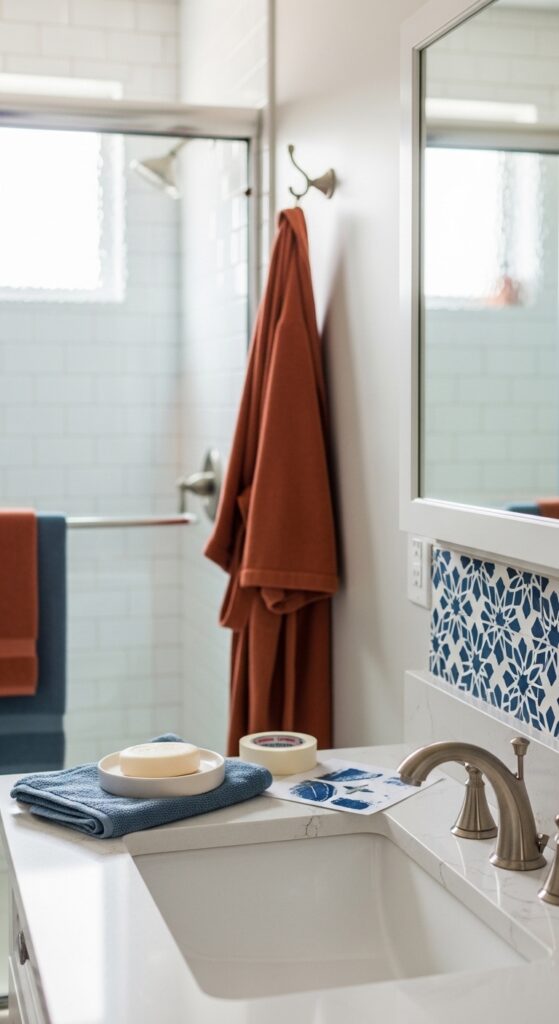
Be realistic though — tile paint needs proper prep and a sealant topcoat, or it’ll chip within weeks. Humidity is tile paint’s worst enemy, so ventilation matters more than your color choice here. Plan for a full weekend including dry time.
The best bathroom upgrades are the ones guests assume you hired someone to do.
Here are a few picks that’ll help you nail this project:
- Waterproof Tile Stencil Set for Bathrooms — Add a repeating pattern to your vanity wall with reusable adhesive stencils for clean lines every time.
- Premium Ceramic Tile Paint Kit — Refresh your existing tiles with a durable satin finish that resists moisture and daily wear.
- Clear Matte Tile Sealant Spray — Lock in your painted design with a protective coat that keeps colors vibrant through steam and splashes.
2. Rope-Wrapped Mason Jar Organizers: Rustic Storage That Actually Works
Picture three mason jars wrapped in jute rope, mounted on a reclaimed wood plank beside your mirror. They hold toothbrushes, cotton rounds, and a tiny succulent — everything visible, everything reachable. The texture of the rope against the glass creates that effortless coastal-farmhouse crossover people pay big money for in stores.
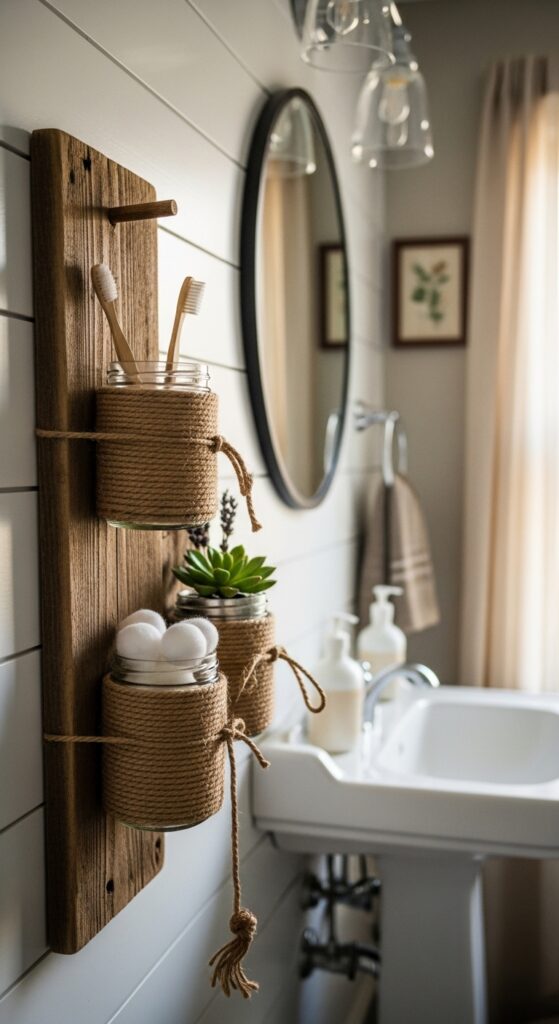
Worth knowing — the rope will loosen over time if you only use hot glue. A combination of hot glue and a thin layer of clear-drying craft adhesive gives it serious staying power. Also, skip putting anything wet directly into the jars unless you add a drainage layer.
Storage should look like it belongs, not like it’s hiding.
These will make the whole setup easier:
- Natural Jute Rope Craft Bundle — Wrap jars, frames, or shelves with thick natural fiber that brings warmth to any DIY bathroom decor project.
- Wall-Mount Mason Jar Holder Plank — Display your organizers on a pre-drilled rustic board that mounts in minutes with two screws.
- Mini Faux Succulent Accent Set — Tuck low-maintenance greenery into your jar arrangement for a pop of color that never needs watering.
3. Floating Shelf Apothecary Display: Turn Everyday Products into Decor
This one flips the script on bathroom storage. Instead of hiding everything behind cabinet doors, you place a single floating shelf above the toilet and arrange your products in matching amber or frosted glass bottles. Decant your hand soap, lotion, and mouthwash — suddenly your shelf looks like a boutique spa, not a cluttered counter.
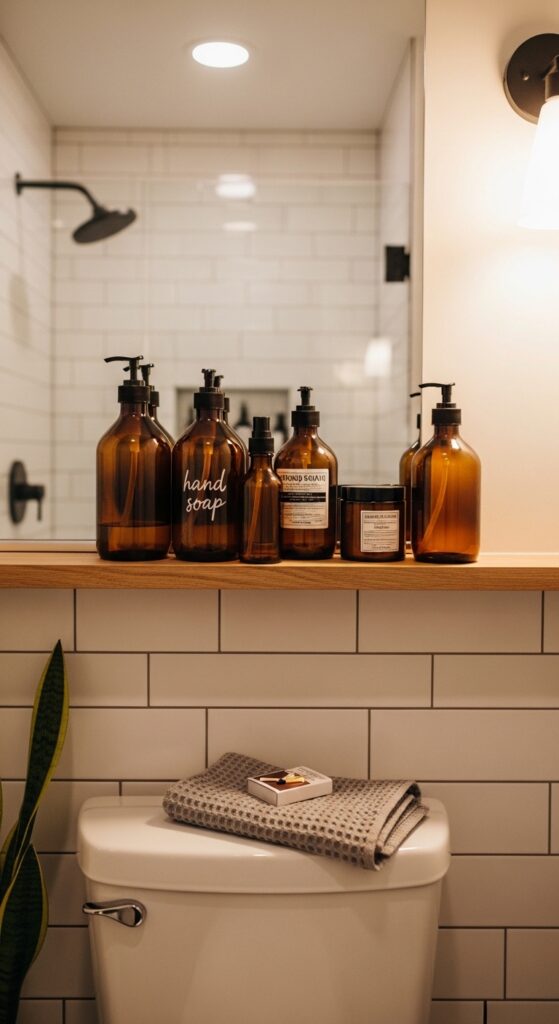
One thing to watch — decanting is only worth it if you actually maintain it. Empty bottles sitting on a pretty shelf for three weeks straight looks worse than the original plastic containers ever did. Set a refill reminder on your phone if you’re forgetful.
When your daily routine looks beautiful, the whole room feels intentional.
Grab these to build the look:
- Amber Glass Pump Bottle Collection — Decant your soap and lotion into matching glass bottles that turn everyday products into display-worthy pieces.
- Slim Floating Bathroom Wall Shelf — Mount a clean-lined ledge that holds your apothecary setup without stealing floor space.
- Waterproof Vinyl Label Strips for Bottles — Identify each bottle with minimal handwritten-style labels that resist moisture and smudging.
4. Peel-and-Stick Wallpaper on the Ceiling: The Unexpected Fifth Wall
Most people forget the ceiling exists. That’s exactly why papering it hits so hard. A soft botanical print or subtle geometric pattern on the ceiling draws the eye upward and makes even a tiny bathroom feel layered and designed. And because it’s peel-and-stick, you can swap it out when you’re bored — no commitment, no damage.
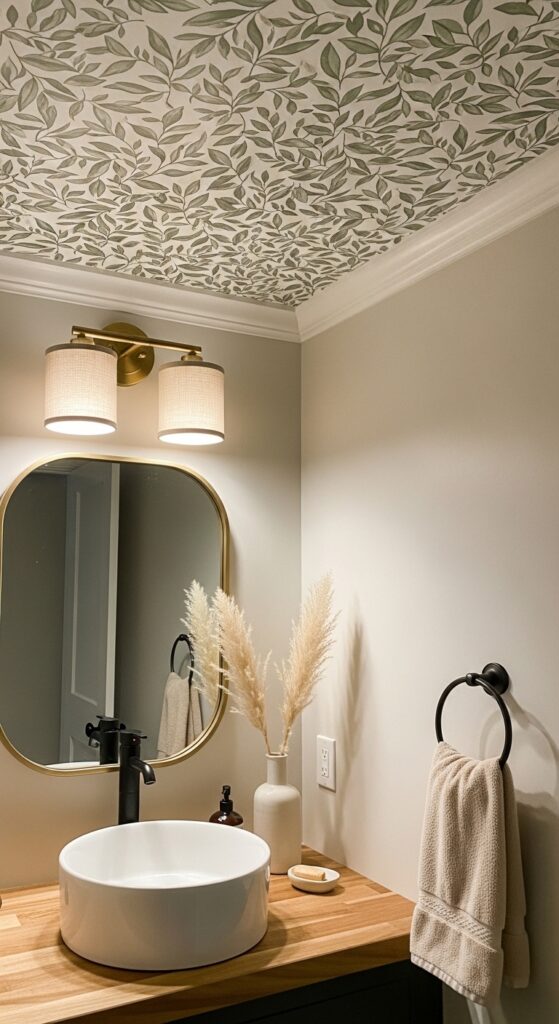
Fair warning — bubbles happen. They just do. Work from the center outward with a smoothing tool, and if your ceiling has any texture, the adhesive won’t grip properly. This trick works best on smooth, primed surfaces. Measure twice so you’re not wasting a full roll on a miscut.
The ceiling is the biggest blank canvas most bathrooms never use.
These products make ceiling wallpaper doable:
- Botanical Peel-and-Stick Ceiling Wallpaper — Cover your fifth wall with a removable floral pattern that adds depth without permanent changes.
- Plastic Wallpaper Smoothing Tool Kit — Eliminate air bubbles and creases with a firm-edge squeegee designed for overhead application.
- Retractable Measuring Tape for Home Projects — Get precise ceiling dimensions before cutting so you waste nothing and align every strip perfectly.

5. DIY Concrete Vanity Tray: Industrial Chic on a Tiny Budget
Mix, pour, wait, sand. That’s the whole process. A hand-poured concrete tray sitting on your vanity corrals perfume bottles, a candle, and a small plant into one intentional vignette. The raw, matte texture of concrete against a white countertop creates a contrast that looks like it came from a design studio, not a plastic mold from the craft store.
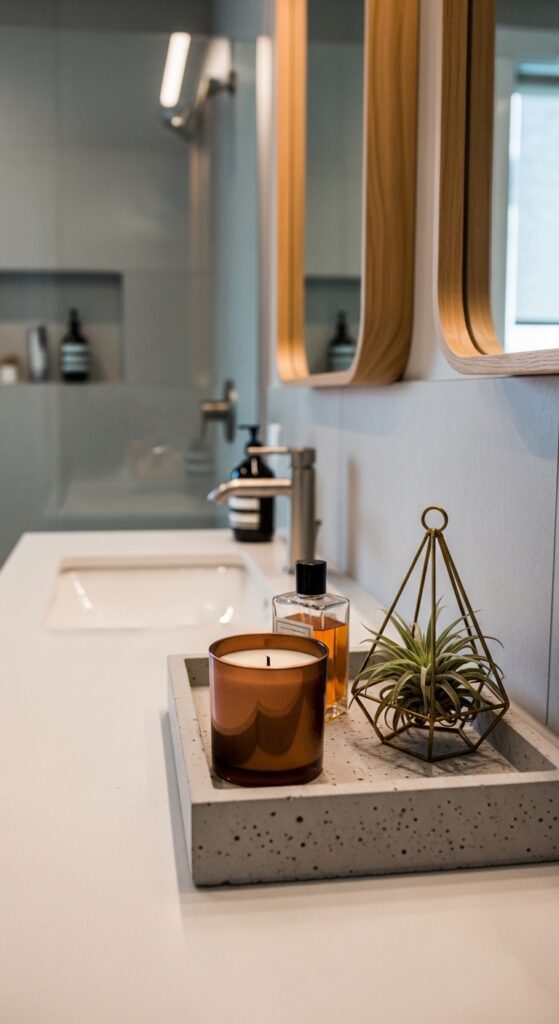
Honestly, your first pour might have pinholes or rough edges. That’s normal — it’s part of the handmade charm, but if it bugs you, a fine-grit sandpaper pass and a coat of concrete sealer smooths things out. Don’t rush the curing time or you’ll crack the whole thing.
Handmade always tells a better story than store-bought.
Start your pour with these:
- Quick-Set Craft Concrete Mix Bag — Pour a smooth vanity tray in any silicone mold with fast-curing concrete that’s ready to demold in hours.
- Silicone Rectangle Tray Mold — Shape your concrete into a clean, sharp-edged tray without worrying about sticking or breakage during removal.
- Fine-Grit Concrete Sanding Block — Smooth rough edges and seal pinholes on your finished piece for a polished, professional look.
6. Thrifted Mirror Frame Makeover: High-End Style from a Secondhand Find
That plain builder-grade mirror sitting above your sink? It’s begging for a frame. But instead of buying a framing kit, hit a thrift store and grab an oversized ornate picture frame — gold, distressed white, even a dark walnut. Trim it to fit or mount it right over the existing mirror with adhesive strips. The result looks like you spent hundreds on a custom piece.
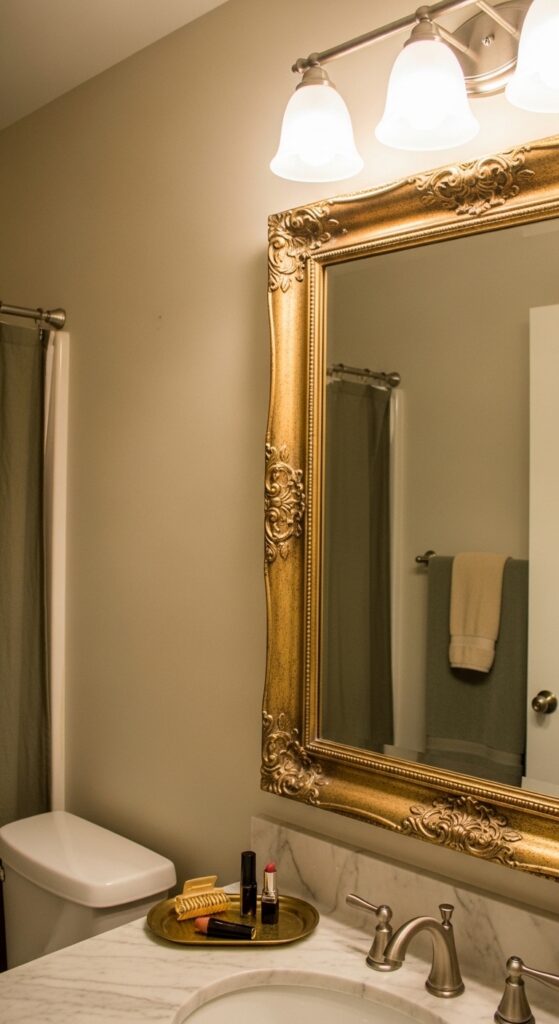
Keep in mind — not every frame sits flush against a wall-mounted mirror. You might need foam spacers behind the frame to bridge the gap. And if your mirror has clips at the edges, factor those into your measurement so the frame actually covers them cleanly.
A five-dollar frame can make a five-hundred-dollar statement.
These help you pull off the look:
- Heavy-Duty Mirror Adhesive Mounting Strips — Attach your thrifted frame directly onto an existing mirror without drilling holes or damaging the glass.
- Metallic Gold Spray Paint for Frames — Give any secondhand find a fresh gilded finish that looks expensive and holds up in humid spaces.
- Foam Mounting Spacer Squares Set — Bridge the gap between frame and mirror surface so everything sits flush and level.
7. Woven Basket Wall Art Arrangement: Texture That Replaces Framed Prints
Flat wall art gets predictable fast. A cluster of woven baskets in varying sizes and weave patterns pinned to the wall above your towel bar creates dimensional, tactile interest that framed prints can’t match. Mix round and oval shapes, vary the tones from natural to dark walnut stain, and overlap a few edges for a collected-over-time feel.
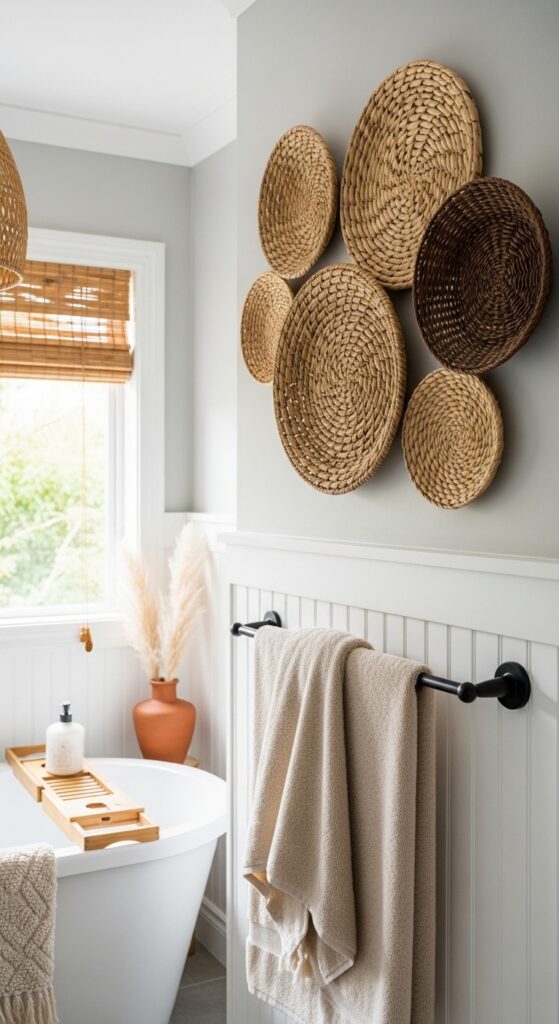
Just so you know — bathroom humidity can warp cheaper baskets over time. Look for tightly woven options or spray them with a clear matte sealant before hanging. Also, command strips work fine for lighter baskets, but anything over a pound needs a proper wall anchor.
Texture on a wall does what color alone never can.
Build your basket wall with these:
- Handwoven Round Wall Basket Set — Arrange a curated cluster of natural fiber baskets that bring organic texture and depth to bare bathroom walls.
- Clear Matte Sealant for Natural Fibers — Protect your woven pieces from steam and humidity so they hold their shape season after season.
- Removable Wall Hooks for Lightweight Decor — Hang and rearrange your basket display without putting a single nail hole in the wall.
8. Painted Bathroom Cabinet Refresh: New Color Without New Cabinets
Ripping out cabinets costs thousands. Painting them costs a Saturday and forty bucks. A coat of sage green, navy, or even matte black on your vanity cabinet changes the entire mood of the room. Pair the new color with swapped-out hardware — brushed brass pulls or matte black knobs — and the effect is a full renovation on a fraction of the budget.
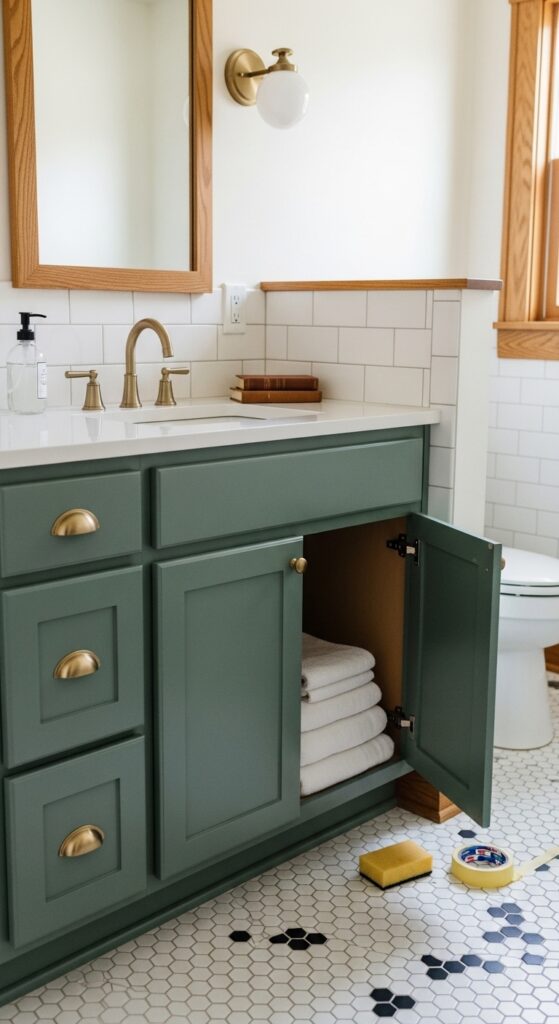
Something to consider — skipping the sanding and priming step is the number one reason DIY cabinet paint jobs peel within months. It’s boring prep work, but it’s the difference between a finish that lasts years and one that chips the first time you bump it with a hairdryer.
New paint and new hardware is the fastest facelift a bathroom can get.
These make the cabinet glow-up happen:
- All-in-One Cabinet Paint and Primer — Cover your vanity in a single coat with a self-leveling formula that dries smooth without brush marks.
- Brushed Brass Cabinet Pull Hardware — Swap outdated handles for warm metallic pulls that instantly update the look of any painted cabinet.
- Fine-Grit Sanding Sponge Multi-Pack — Prep your cabinet surface properly so paint adheres without peeling, even in high-moisture rooms.
9. Fresh Greenery Shelf with Trailing Plants: A Living Accent That Breathes Life In
Nothing shifts the energy of a bathroom like a living plant trailing off a narrow shelf. Mount a slim ledge near a window — or even above the showerhead if there’s light — and let a pothos, string of pearls, or trailing philodendron do its thing. The green against white tile or neutral walls creates an instant spa atmosphere that no candle or air freshener can replicate.
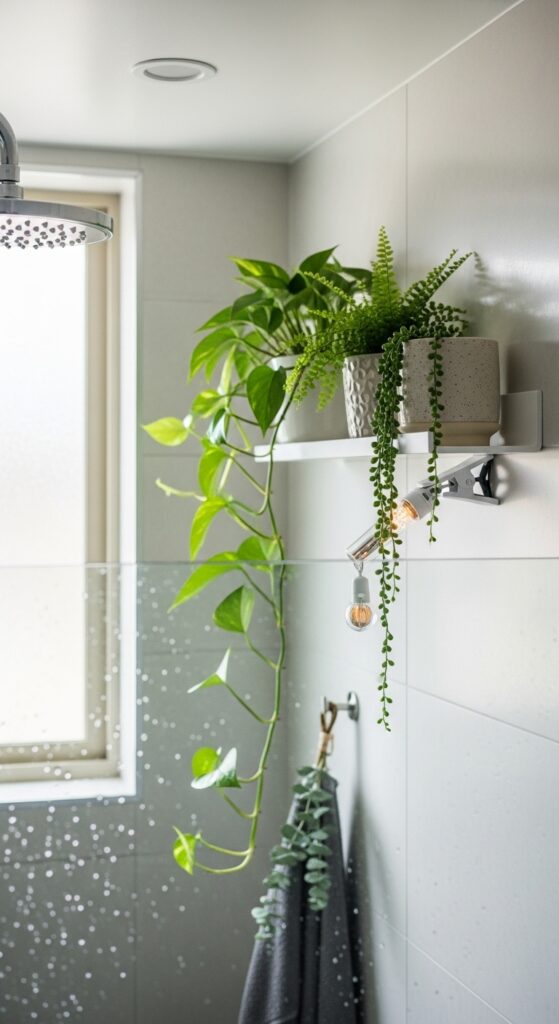
Real talk — not every bathroom has enough light for plants. If yours doesn’t, a grow-light bulb in your existing fixture solves it, or you go with high-quality faux trailing plants that fool everyone. Don’t force a real plant into a dark, windowless room and then blame the plant when it dies.
A single trailing vine can make a whole bathroom feel alive.
Set up your green corner with these:
- Narrow Floating Plant Shelf with Lip — Mount a slim ledge that keeps pots secure while giving trailing vines room to cascade naturally.
- Full-Spectrum Grow Light Screw-In Bulb — Give your bathroom plants the light they actually need with a bulb that fits any standard fixture.
- Realistic Faux Trailing Pothos Vine — Drape lifelike greenery over your shelf for that lush DIY bathroom decor look — zero watering, zero guilt.

InsideMake exists for one reason — to help you love your home more. We bring expert decor insights and room-specific inspiration directly to you.