
There’s something about walking into a kid’s room that feels a little too “catalog perfect” that makes you want to mess it all up with paint and glue. The best children’s spaces aren’t the ones that cost a fortune — they’re the ones with personality, the ones that tell a story.
If you’ve been scrolling through Pinterest looking for kids room DIY projects that go beyond basic wall decals and dollar-store bins, you’re in the right place. Maybe the room feels bland. Maybe your kid’s outgrowing the toddler theme. Maybe you just want a weekend project that doesn’t require a contractor.
What you’ll find here are 10 genuinely creative, doable ideas — each one specific enough to start this weekend. From hand-painted murals to clever storage hacks, every idea stands on its own so you can pick the one that speaks to you. Let’s get into it.
1. Hand-Painted Mountain Mural with Sunset Gradient Tones
A mountain mural in soft gradient tones turns a plain wall into the kind of backdrop kids actually stare at before falling asleep. You don’t need artistic talent — just painter’s tape, three coordinating paint colors, and a free afternoon. The trick is layering peaks from dark at the base to pale near the ceiling so the wall feels like it has real depth.
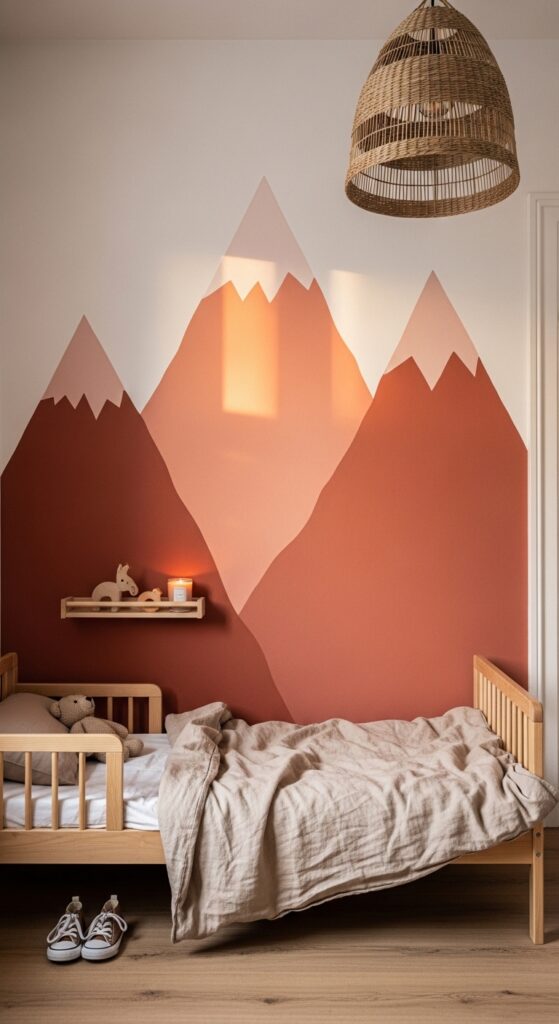
Be realistic though — taping clean lines takes patience, and your first peak might look wobbly. Touch-ups are normal. Budget two coats minimum for the darker shades and protect your flooring because gradient blending gets messy fast.
The wall your kid draws in crayon next to is the one that actually matters.
Here’s what’ll bring this mural to life:
- Soft-Bristle Angled Wall Paint Brush Set — Blend gradient tones on your mural wall with precision-cut bristles for smooth color transitions.
- Low-Tack Painters Tape for Delicate Surfaces — Create crisp mountain peak lines on your wall without pulling off base paint when removed.
- Matte Finish Acrylic Wall Paint Sampler Kit — Test your sunset gradient palette on a small patch before committing to the full mural wall.
2. Pegboard Activity Wall with Rotating Toy Hooks
Forget static shelving — a painted pegboard mounted at kid-height becomes a rotating display wall where toys, art supplies, and little treasures swap in and out weekly. Paint the pegboard to match the room’s palette, add metal and wooden hooks in different sizes, and suddenly cleanup becomes a game instead of a fight.
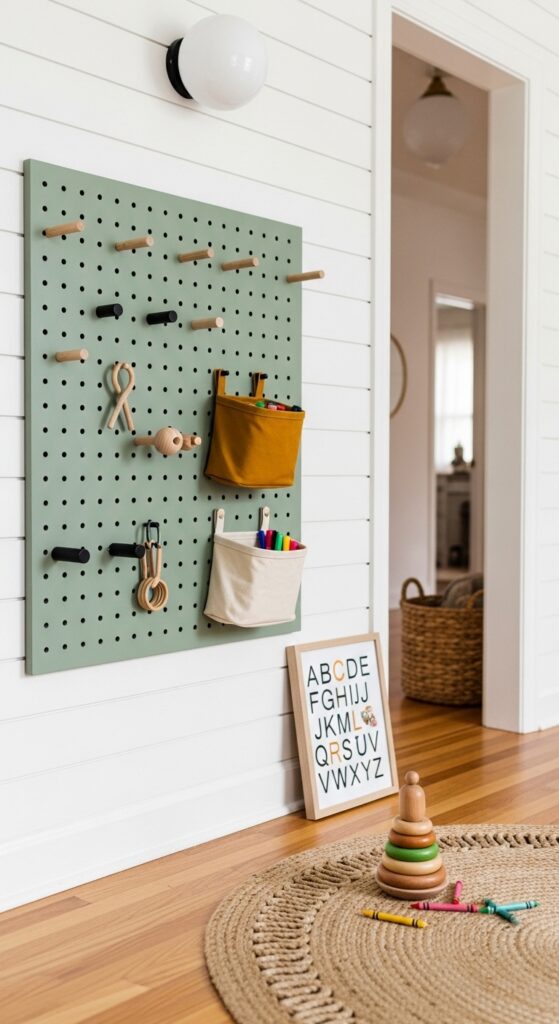
One thing to watch — pegboards need solid wall anchoring, not just drywall screws. Heavy bins or chunky toys will pull a poorly mounted board right off the wall. Stick with lightweight items unless you hit studs.
A wall that changes every week never gets boring.
These picks make the pegboard setup effortless:
- Sturdy Wooden Pegboard Panel for Kids Rooms — Mount a customizable display wall at child height with pre-drilled holes for easy hook rearranging.
- Colorful Metal Pegboard Hook Assortment Pack — Hang lightweight bins and toys from your pegboard using kid-safe rounded hooks in bright finishes.
- Small Canvas Storage Bins for Pegboard Display — Organize art supplies and small toys in soft fabric bins that slip right onto pegboard hooks.
3. Cloud-Shaped Floating Bookshelf with Hidden Brackets
A shelf cut and painted to look like a fluffy cloud gives forward-facing books a dreamy backdrop kids actually notice. Use a jigsaw to cut the cloud shape from MDF, sand the edges smooth, and mount it with hidden L-brackets so the shelf looks like it’s floating. White paint with a barely-there gray shadow along the bottom edge sells the illusion.
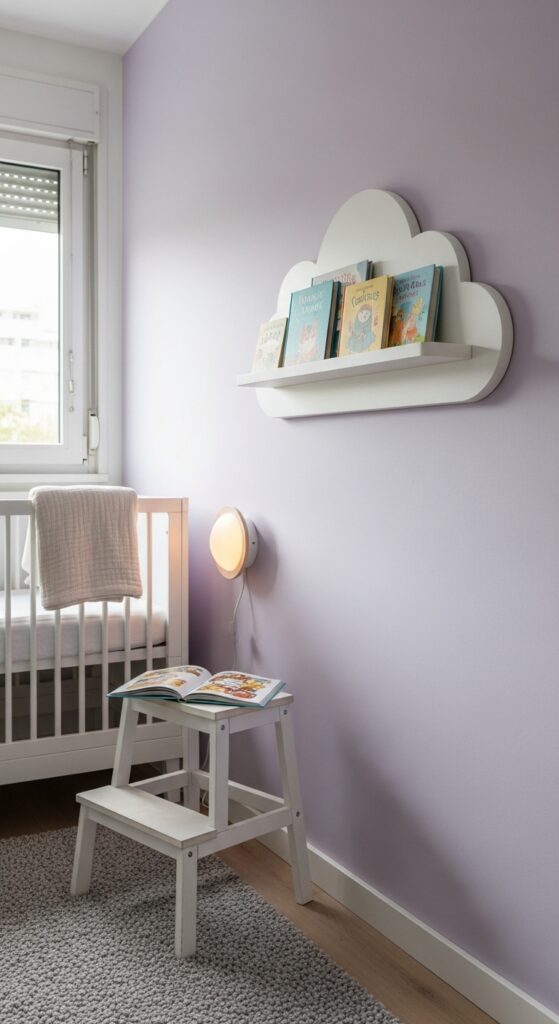
Worth knowing — MDF is heavy once you go wider than 24 inches. You’ll need a second pair of hands for mounting, and the hidden brackets must be rated for the shelf’s weight plus a full row of hardcover picture books.
Kids reach for books more often when the shelf itself looks like a story.
Grab these to build your cloud shelf:
- Pre-Cut MDF Craft Board for Wall Projects — Shape your cloud bookshelf from smooth, paintable MDF that cuts cleanly with basic power tools.
- Heavy-Duty Hidden Floating Shelf Bracket Set — Mount your cloud shelf flush to the wall so it looks suspended without any visible hardware.
- Ultra-Smooth Fine Grit Sandpaper Variety Pack — Sand curved cloud edges perfectly smooth before painting so little fingers never catch a rough spot.
4. Glow-in-the-Dark Ceiling Star Map Constellation
Painting actual constellation patterns on the ceiling with glow-in-the-dark paint beats those peel-and-stick star packs by a mile. Print a real star map of your kid’s birth month, transfer the dot pattern to the ceiling with a pencil, then dab each star with phosphorescent paint. The result charges from the bedroom light and glows for hours.
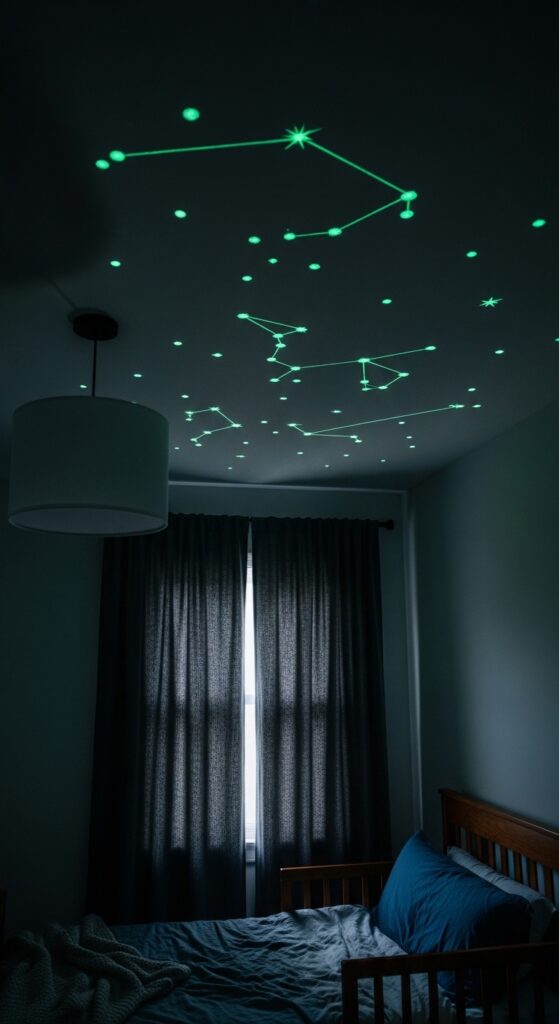
Fair warning — cheap glow paint fades to a yellowish tint in daylight and looks sloppy. Invest in quality phosphorescent paint that dries clear so the ceiling looks normal during the day and magical at night. You’ll also need a ladder and neck stamina.
Falling asleep under the exact sky from the night you were born is the kind of detail kids never forget.
These make your star map ceiling possible:
- Premium Clear-Dry Glow in Dark Paint — Dot constellation patterns on your ceiling with paint that dries invisible and glows bright green for hours.
- Printable Astronomy Star Chart Birth Month Set — Map real constellation positions onto your ceiling using accurate star charts sized for room-scale transfer.
- Fine-Tip Detail Paint Brush for Ceiling Work — Place precise star dots on your ceiling without drips using a slim brush designed for overhead detail painting.
5. Washi Tape Geometric Accent Wall in Bold Colors
Washi tape is the commitment-phobe’s best friend for kids room DIY accent walls. Lay out triangles, hexagons, or an abstract color-block pattern directly on a painted wall — no holes, no permanent damage, no landlord drama. Use three or four tape colors that pull from the bedding or rug palette.
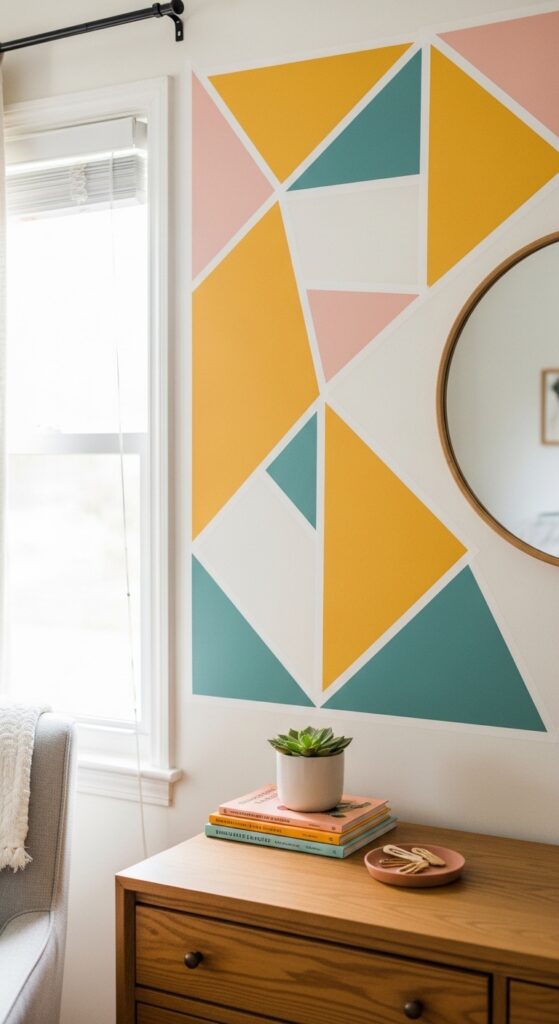
The honest truth — washi tape on textured walls won’t stick well and starts peeling within weeks. This works best on smooth, semi-gloss or satin-finish walls. Press edges firmly with a credit card and replace any curling strips before they collect dust and lose all adhesion.
Temporary doesn’t have to mean boring — it just means you can change your mind next month.
Stock up on these for your tape wall:
- Wide Premium Washi Tape in Geometric Patterns — Build a bold accent wall using wide tape strips that stick cleanly to smooth painted surfaces.
- Precision Craft Knife with Safety Cap — Cut crisp tape angles and intersections on your accent wall without tearing or stretching the washi strips.
- Plastic Smoothing Tool for Wall Tape Projects — Press tape edges flat against your wall to prevent peeling and air bubbles in geometric designs.
6. Rope-Wrapped Hanging Shelf for Stuffed Animal Display
Two wooden boards, four lengths of thick cotton rope, and a ceiling hook — that’s all it takes to build a hanging shelf that turns a stuffed animal collection into an actual room feature. Drill holes in each corner of the boards, thread the rope through, knot below each shelf level, and hang from a heavy-duty ceiling hook.
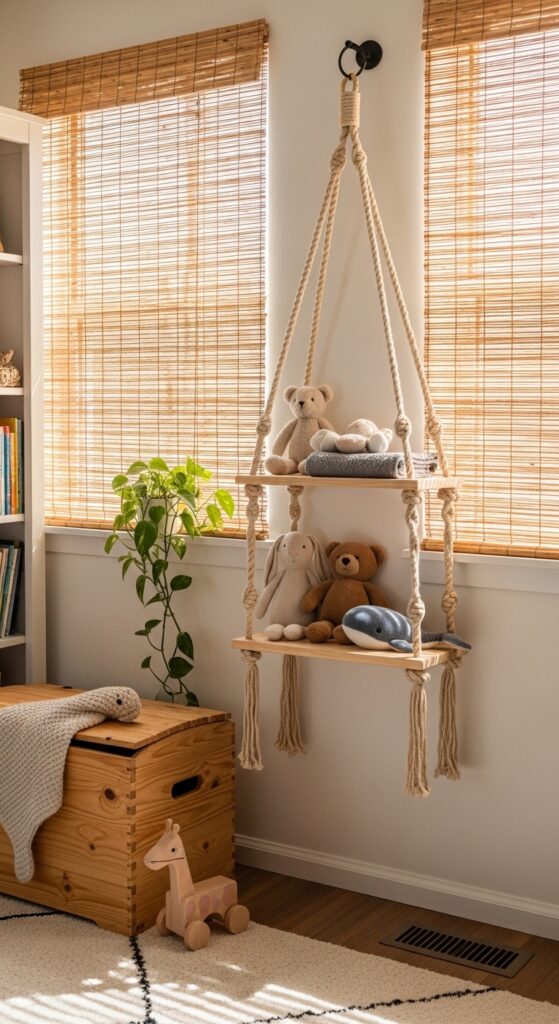
Here’s the thing nobody tells you — rope stretches under weight. Your shelf will hang slightly lower after a week of loaded use. Tie knots tight, leave extra length at the top for adjustment, and don’t overload the bottom shelf or the whole thing tilts.
A collection deserves a display, not a pile in the corner.
These pieces build your hanging shelf:
- Natural Thick Cotton Macramé Rope Bundle — Thread sturdy cotton rope through shelf boards for a hanging display that holds its shape under stuffed animal weight.
- Unfinished Solid Pine Craft Shelf Board Pair — Drill and suspend two smooth pine boards as your hanging shelf tiers with rope through each corner.
- Heavy-Duty Ceiling Swag Hook with Anchor — Hang your rope shelf securely from the ceiling with a hook rated for the weight of loaded wooden shelves.
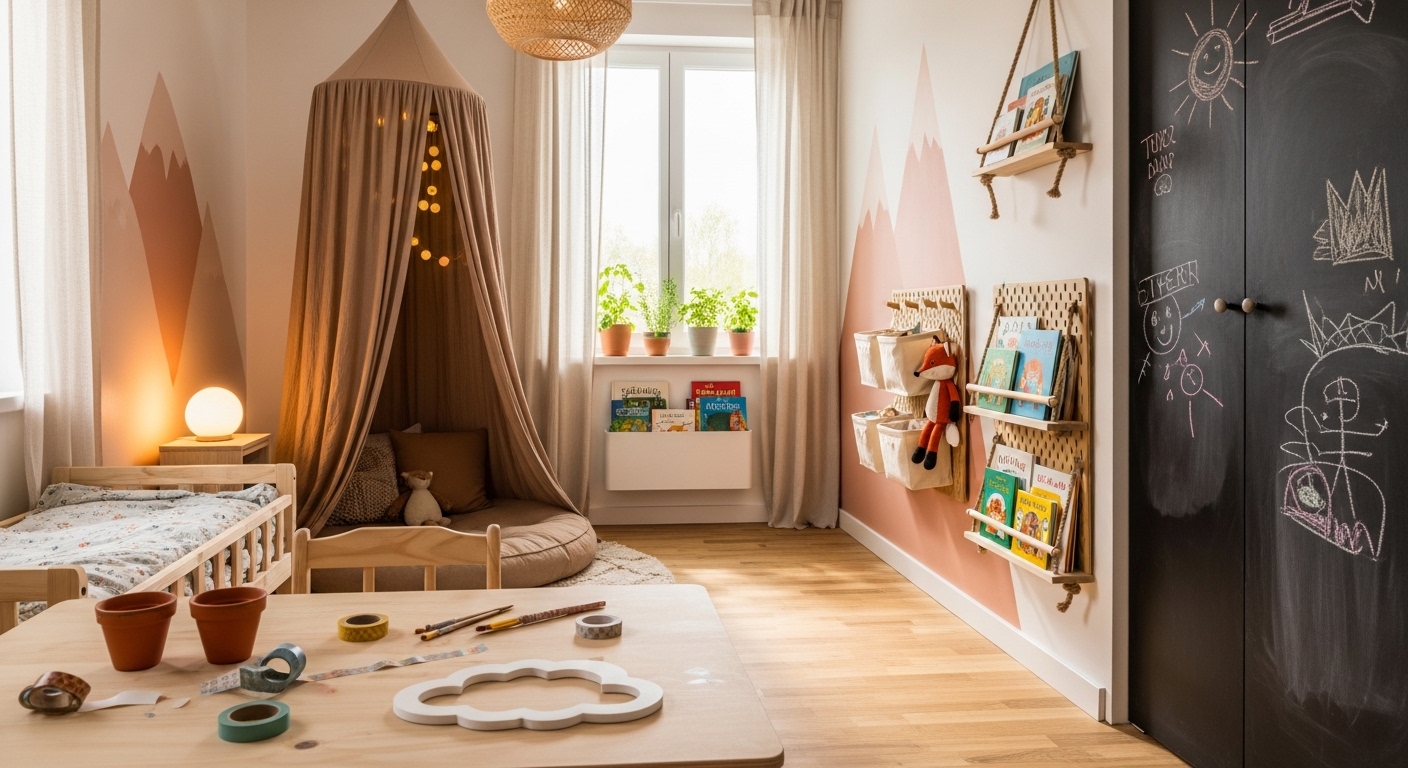
7. Chalkboard-Painted Closet Door for Daily Doodles
Painting the inside or outside of a closet door with chalkboard paint gives kids a massive drawing surface that doesn’t eat into wall space. Two coats of magnetic chalkboard paint means the door holds magnets too — letters, photos, chore charts. It’s a kids room DIY project that takes under two hours and stays useful for years.
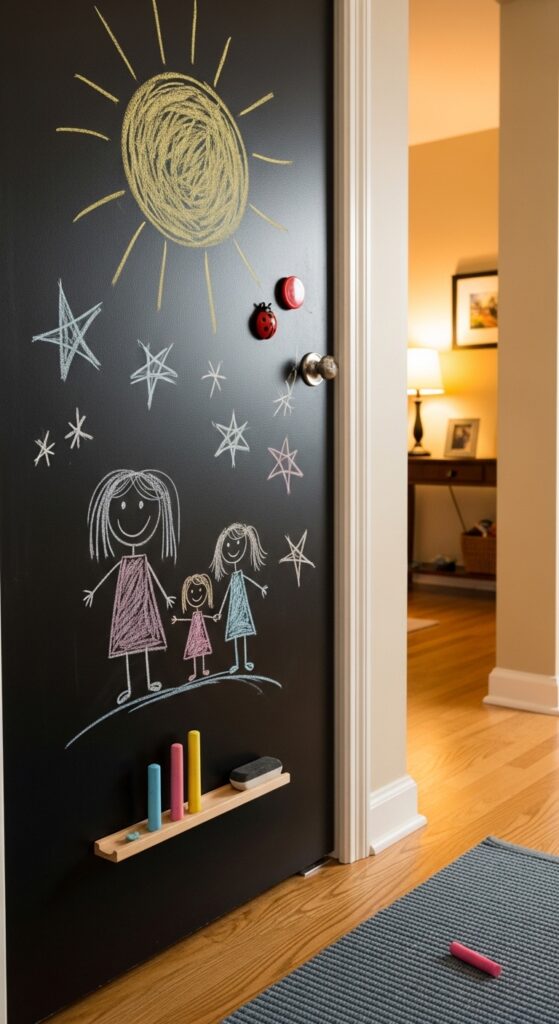
One practical note — chalkboard paint needs proper curing time. If your kid draws on it too soon, the chalk won’t erase cleanly and you’ll get permanent ghost lines. Wait the full 72 hours the label recommends. Season the surface by rubbing the side of a chalk stick across the whole door first.
The door they’re allowed to draw on is the one they’ll always remember.
Grab these for your chalkboard door project:
- Magnetic Chalkboard Paint for Interior Surfaces — Coat your closet door with two layers of magnetic chalkboard paint that holds magnets and erases cleanly.
- Dustless Colored Chalk Stick Variety Box — Let kids doodle on their chalkboard door without the mess of regular chalk dust coating the bedroom floor.
- Felt Chalkboard Eraser with Comfortable Grip — Wipe doodles off the closet door quickly with a soft eraser that won’t scratch the chalkboard paint surface.
8. Fabric Canopy Reading Nook in a Corner Spot
A draped fabric canopy over a floor cushion in a corner creates a reading nook that feels like a secret hideout. Use a ceiling-mounted curtain rod bent into a half-circle, drape sheer or cotton fabric from it, and pile the floor with oversized cushions and a battery-powered string light. The nook claims maybe six square feet and changes the whole energy of the room.
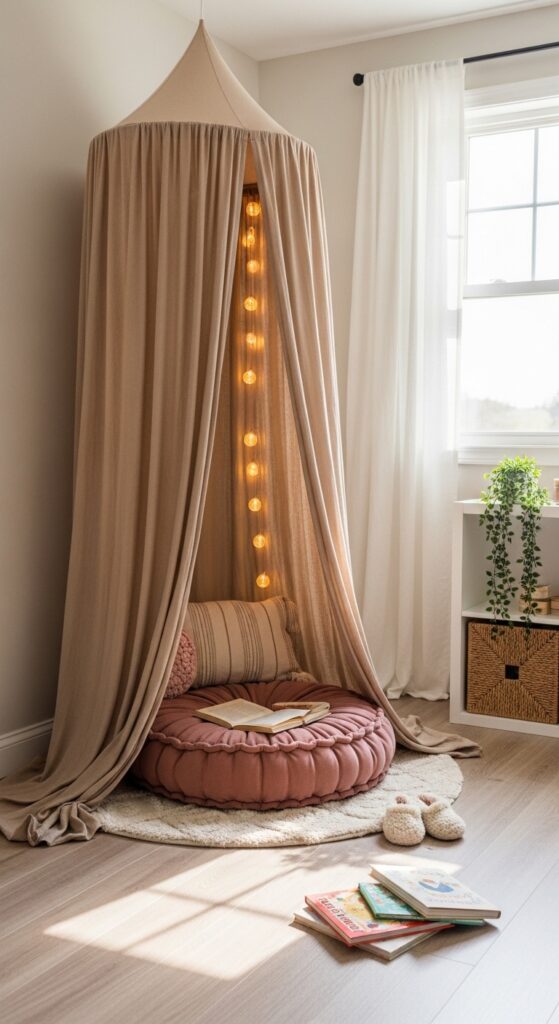
Something to consider — sheer fabric tears easily when kids pull on it, and they will pull on it. Choose a mid-weight cotton or linen blend that can handle some tugging. Wash it monthly because fabric canopies collect dust fast, especially near windows.
Every reader deserves a spot that feels like it belongs only to them.
Set up your reading nook with these:
- Half-Circle Ceiling Mount Curtain Rod Kit — Anchor your fabric canopy to the ceiling in a smooth arc that drapes perfectly over a kids reading corner.
- Soft Woven Floor Cushion for Kids Spaces — Create a cozy base for your reading nook with a thick cushion that’s comfortable enough for hour-long story sessions.
- Battery Powered Warm Fairy String Lights — Wrap soft warm lights around your canopy frame to make the reading nook glow without needing a nearby outlet.
9. Painted Doorway Growth Chart with Ruler Markings
Skip the store-bought growth chart stickers — paint one directly onto the door frame or a flat board mounted beside the doorway. Use a real ruler to mark inches, paint the lines in a contrasting color, and add each kid’s name and date at their height. It becomes a permanent piece of family history that no decal can replicate.
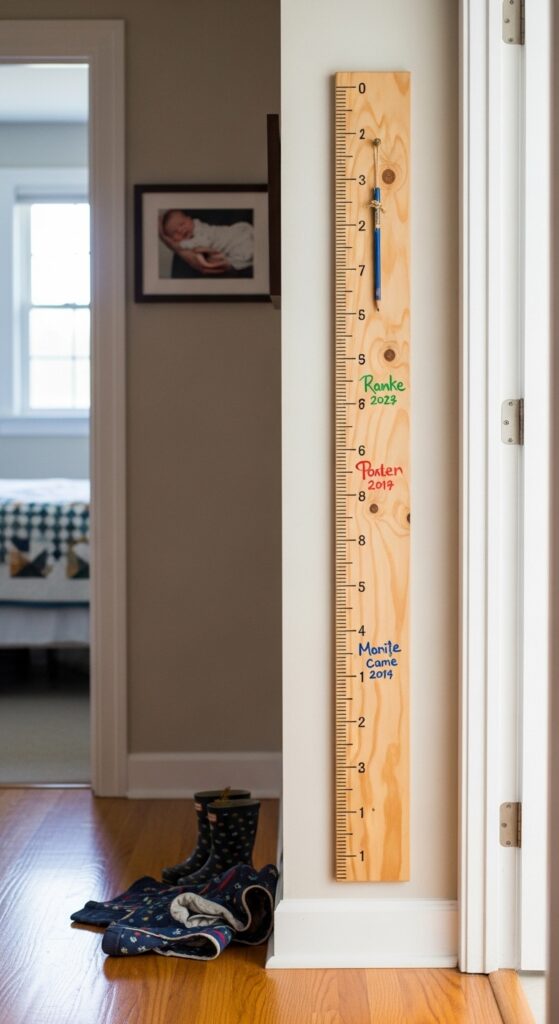
Real talk — painting straight lines on a vertical surface is harder than it sounds. Use a level, tape every line before you paint, and go slow. Also, if you paint it directly on the door trim and later move houses, you’ll lose it. A removable board you can take with you is the smarter play.
Marks on a wall aren’t damage — they’re proof your family was here.
These help you build a growth chart that lasts:
- Narrow Flat Wood Board for Wall Chart Mount — Paint your custom growth chart on a portable board that moves with your family to every new home.
- Thin Line Detail Masking Tape for Precise Lines — Tape ruler markings on your growth chart board for perfectly straight painted lines at every inch interval.
- Archival Ink Fine Point Marker for Wood — Write names and dates next to height marks on your growth chart with ink that won’t fade or bleed on painted wood.
10. Window Sill Herb Garden with Painted Terracotta Pots
Letting kids paint their own terracotta pots and grow herbs on the bedroom windowsill sneaks some science into the room without it feeling like homework. Basil, mint, and chives are nearly impossible to kill, grow fast enough to keep a kid’s attention, and smell good enough to make the room feel alive. Use acrylic paint and a clear sealant on the pots so the colors survive watering.
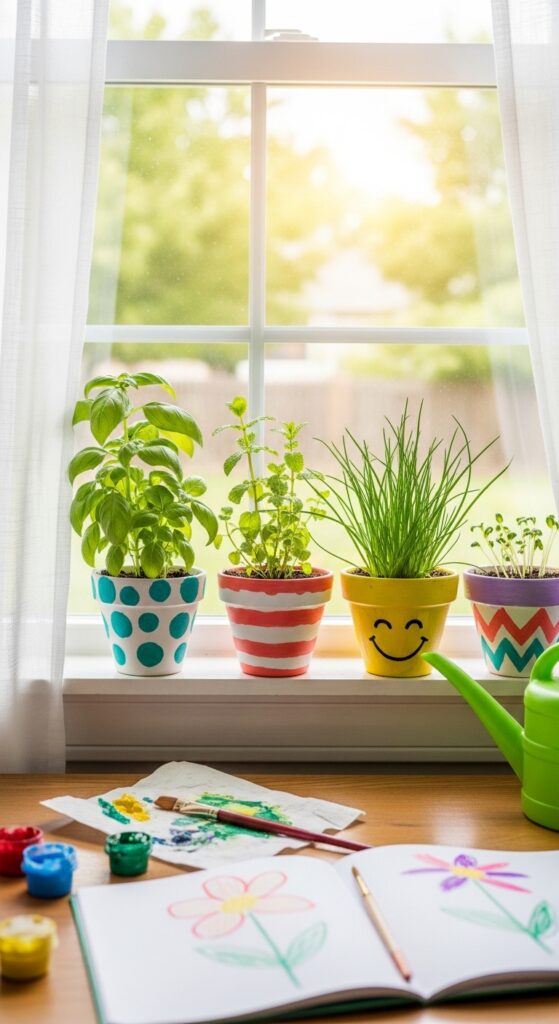
Keep expectations in check — windowsill herbs need direct sunlight for at least six hours. A north-facing window won’t cut it. Overwatering is the number one killer, so teach your kid the finger-in-the-soil test before handing over the watering can.
Growing something alive in your own room teaches patience better than any lecture ever could.
Get your windowsill garden started:
- Small Terracotta Plant Pots with Drainage Holes — Give kids a set of classic clay pots to paint and plant herbs in for their bedroom windowsill garden.
- Non-Toxic Acrylic Craft Paint Set for Kids — Let little hands paint bright designs on terracotta pots with safe, water-based acrylics that dry quickly and stay vibrant.
- Indoor Herb Seed Starter Kit with Soil Pellets — Grow basil, mint, and chives from seed on the windowsill using pre-measured soil pellets that simplify planting for kids.
InsideMake exists for one reason — to help you love your home more. We bring expert decor insights and room-specific inspiration directly to you.